
Understanding RV electrical hookups is essential for safe and efficient camping experiences. This guide covers the basics, types of connections, and adapters, ensuring a secure setup. Downloadable PDF checklists and step-by-step instructions help you master the process.
Understanding the Basics of RV Electrical Systems
RV electrical systems operate on two primary circuits: a 120-volt AC system and a 12-volt DC system. The 120V AC system powers larger appliances like microwaves and air conditioners, while the 12V DC system runs essential components such as lighting and water pumps. Shore power connects your RV to an external electrical source, while generators provide power when hookups are unavailable. Batteries store energy for the 12V system, charged via shore power, solar panels, or alternators. Understanding these systems ensures safe and efficient energy use. Always use adapters and surge protectors to prevent damage. Regular inspections of cables and connections are crucial to avoid electrical hazards. Proper setup and maintenance will keep your RV running smoothly and securely. Refer to your hook up format PDF for detailed diagrams and setup instructions.
Importance of Proper Electrical Hookup
Proper RV electrical hookup is crucial for safety, functionality, and preventing damage to your system. Incorrect connections can lead to electrical hazards, such as shocks, fires, or appliance malfunctions. Ensuring your RV is hooked up correctly protects both your vehicle and the campground’s infrastructure. It also guarantees reliable power supply for essential systems like lighting, heating, and refrigeration. Proper hookups prevent voltage fluctuations, which can damage sensitive electronics. Always use the right adapters and follow the manufacturer’s guidelines to avoid overloading circuits. Regular inspections of power cables and connections are vital to maintain safety and efficiency. By adhering to best practices, you ensure a secure and enjoyable camping experience. Refer to your hook up format PDF for detailed instructions and safety protocols to avoid common mistakes.
Safety Considerations for RV Electrical Setup
Safety is paramount when setting up your RV’s electrical system. Always turn off the main breaker before connecting to a power source to prevent shocks or electrical surges. Use a surge protector to safeguard against voltage spikes, which can damage appliances. Inspect power cables and connectors for wear or damage; never use compromised wiring. Avoid overloading circuits, as this can cause overheating or fires. Ensure all connections are secure and meet local electrical codes. Keep flammable materials away from electrical components. Grounding your RV’s electrical system is essential to prevent shocks and ensure proper operation. Never attempt repairs or modifications without proper knowledge or tools. Regularly test your system for faults and consult a professional if unsure. Adhering to these safety practices minimizes risks and ensures a secure RV electrical setup.

Standard Electrical Hookup for RVs
Standard RV electrical hookups typically involve 30-amp or 50-amp services, depending on the RV’s power requirements. A shore power cord connects to a campground outlet, ensuring reliable electricity. Use appropriate adapters for compatibility and always follow safety guidelines to avoid overloading circuits. Proper installation and regular inspections are crucial for safe operation.
30-Amp vs. 50-Amp Outlets
When setting up your RV’s electrical hookup, understanding the difference between 30-amp and 50-amp outlets is crucial. A 30-amp outlet (TT-30) is standard for smaller RVs, travel trailers, and Class B/C motorhomes, providing 3,600 watts of power. It uses a three-prong plug and is suitable for basic electrical needs. On the other hand, a 50-amp outlet (SS2-50) is designed for larger motorhomes and RVs with high-power appliances, offering 12,000 watts of power. It uses a four-prong plug and supports 120/240-volt systems, ideal for running multiple air conditioners or heavy-duty equipment. Always check your RV’s manual to determine the required amp service. Using the correct outlet ensures safe and efficient power delivery, preventing overload or damage to your electrical system. Adapters can help connect to different outlet types, but verify compatibility first.
Understanding RV Adapters and Their Usage
RV adapters are essential for connecting your rig to various power sources, ensuring compatibility and safety. A 30-amp to 50-amp adapter allows smaller RVs to plug into higher-power outlets, while a 50-amp to 30-amp adapter enables larger RVs to use standard outlets. These adapters prevent overloading and protect your electrical system from damage. Always choose the correct adapter based on your RV’s power requirements, as specified in the manual. Safety is paramount; using the wrong adapter can lead to electrical issues or even fires. Regularly inspect adapters for damage or wear and consider using a surge protector to safeguard against voltage spikes. Proper adapter usage ensures reliable power delivery, keeping your RV’s systems functioning smoothly during your camping adventures. Downloadable checklists can help you keep track of essential adapters and connections.
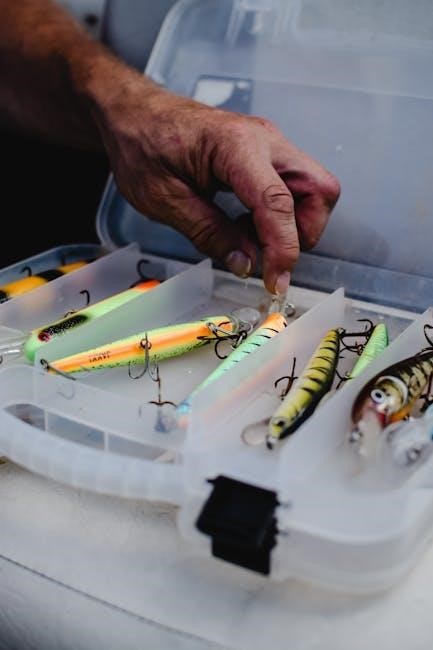
Necessary Components for RV Electrical Connection
A proper RV electrical connection requires several key components to ensure safety and functionality. The primary items include a power cable (30- or 50-amp), adapters for compatibility with different outlets, and a surge protector to prevent voltage spikes. A circuit analyzer is also crucial for testing the power source before connecting. Additionally, a shore power inlet on your RV ensures a secure connection to external power. Always use heavy-duty cables rated for outdoor use to avoid overheating. These components work together to provide a reliable and safe electrical supply for your RV’s systems. Consulting your RV manual and using a downloadable setup checklist can help ensure all components are correctly installed and utilized for a seamless camping experience.
Step-by-Step Guide to RV Hookup Setup
This guide outlines the essential steps for setting up your RV’s electrical, water, and sewer connections. Start by choosing a suitable campsite with necessary hookups. Level your RV to ensure proper functionality. Next, connect to power sources safely using the right adapters and cables. Then, set up water and sewer hookups securely. Finally, finalize the setup by testing all systems and ensuring everything operates smoothly. Refer to our downloadable RV setup checklist for a detailed, step-by-step process to ensure a safe and enjoyable camping experience.
Choosing the Right Campsite for Your RV
Selecting the right campsite is crucial for a seamless RV experience. Ensure the site matches your RV’s size and electrical requirements, whether it’s a 30-amp or 50-amp hookup. Look for campsites with level ground to simplify the leveling process. Check for proximity to water, sewer, and power connections. Verify the campsite’s amenities, such as dump stations and potable water, to meet your needs. Research reviews and campsite layouts to avoid tight spaces or obstructions. Many campsites offer online checklists and guides to help you prepare. Always confirm the campsite’s rules and regulations before arrival. A well-chosen campsite ensures safety, comfort, and access to essential utilities for an enjoyable RV adventure.
Leveling Your RV for Proper Functionality
Leveling your RV is a critical step for ensuring proper functionality and safety. Begin by positioning your RV on level ground or use leveling blocks to create a stable surface. Chock the wheels to prevent movement during setup. Use a bubble level to check the RV’s balance, front-to-back and side-to-side. Adjust the RV’s height with jacks or blocks as needed. Proper leveling ensures appliances like refrigerators and water heaters work efficiently. For motorhomes, disconnect the tow vehicle before leveling to avoid interference. Once leveled, secure the RV with stabilizing jacks to minimize swaying. Always refer to your RV’s manual for specific leveling instructions. A well-leveled RV provides a comfortable living space and prevents potential damage to internal systems.
Connecting to Power Sources Safely
Connecting your RV to power sources requires careful attention to safety. Always turn off the breaker at the campsite and your RV before plugging in. Use a surge protector to shield your RV’s electrical system from power surges. Select the correct adapter for your RV’s electrical needs, ensuring it matches the campsite’s outlet (30-amp or 50-amp). Avoid overloading circuits by monitoring power usage. Inspect the power cord and plug for damage before use. Plug the RV end into your rig first, then connect to the campsite outlet. Turn the breaker on and test appliances one by one. Keep flammable materials away from the connection point. Regularly check for overheating or tripped breakers. Always follow your RV’s manual for specific electrical guidelines to ensure a safe and reliable connection.
Setting Up Water and Sewer Hookups
Setting up water and sewer hookups is crucial for a functional and hygienic RV camping experience. Start by locating the water and sewer connections at your campsite. Use a high-quality RV water hose with a built-in water pressure regulator to connect to the water supply. Attach the hose to your RV’s water inlet, ensuring a secure fit; For the sewer hookup, connect your RV’s sewer hose to the rig’s waste outlet and the campsite’s sewer drain. Use a sewer hose with a clear elbow to monitor flow and prevent clogs. Always wear gloves and ensure a tight, leak-free connection. Regularly inspect hoses for damage and store them properly after use. Follow campsite rules for water conservation and waste disposal. Consider using RV-specific water filters and sewer accessories for added protection and convenience. Proper setup ensures safe and efficient water and waste management during your stay.
Finalizing the RV Setup Process
Once all connections are secure, perform a final check to ensure everything is functioning properly. Test the electrical, water, and sewer systems to confirm they are working as expected. Tighten all connections to prevent leaks or disconnections. Stow hoses and cables neatly to avoid tripping hazards. Double-check the leveling system and ensure the RV is stable. Refer to your RV setup checklist to ensure no steps were missed. Finally, test all appliances and utilities to confirm they are operational. Properly securing and organizing your setup ensures safety and convenience throughout your camping experience. Always follow safety guidelines and manufacturer instructions for a hassle-free RV adventure.

RV Electrical Hookup Tips and Best Practices
Always use the correct adapters for your RV’s electrical system to avoid damage. Regularly inspect power cables for wear and tear. Never overload circuits to prevent tripped breakers. Use surge protectors to safeguard your RV’s electronics. Properly store cables when not in use to maintain their condition. Keep a printable RV setup checklist handy for quick reference. Ensure all connections are secure and follow manufacturer guidelines for safe operation. These practices ensure a reliable and safe electrical hookup experience during your camping adventures.
Using the Right Adapters for Your RV
Using the correct adapters for your RV’s electrical system is crucial to ensure safe and proper connections; Adapters help bridge compatibility issues between your RV’s plug and the campsite’s outlet, preventing damage to your electrical system. Common adapters include 30-amp to 50-amp and 50-amp to 30-amp connectors, depending on your RV’s power requirements. Always carry a set of adapters to accommodate different hookup situations. Using the wrong adapter can lead to power surges or equipment damage, so double-check compatibility before plugging in. Refer to your RV’s manual or a downloadable PDF setup checklist for guidance on selecting the right adapters for your specific setup. This ensures a safe and reliable electrical connection every time you camp.
Regular Inspection of Power Cables
Regular inspection of your RV’s power cables is essential to ensure safety and prevent electrical issues. Check for frays, burn marks, or bent pins on both the RV plug and the power cable. Damage can lead to electrical failures or fires. Inspect the entire length of the cable for signs of wear or rodent damage. Clean connectors regularly to avoid corrosion. Replace any damaged cables immediately to maintain system integrity. Additionally, ensure all adapters and connectors are rated for your RV’s power requirements. Refer to your RV’s manual or a downloadable PDF setup checklist for guidance on inspecting and maintaining your electrical system. Regular inspections help prevent issues and ensure a safe, reliable connection during your camping trips.
Upgrading Your RV Electrical System
Upgrading your RV electrical system can enhance performance and safety, especially for modern appliances and devices. Consider installing a higher-capacity inverter or converter to handle increased power demands. Lithium batteries are a popular upgrade, offering longer lifespan and faster charging. Ensure all components, like circuit breakers and wiring, are rated for the upgraded system. Consult a professional to avoid electrical hazards and ensure compliance with safety codes. Regularly review your setup and adapt to new technologies. Downloadable checklists and guides can help plan and execute upgrades efficiently. A well-upgraded system provides reliability and peace of mind for extended camping trips. Always prioritize safety and compatibility when making electrical modifications to your RV;
Avoiding Common Electrical Mistakes
Avoiding common electrical mistakes is crucial for safe and reliable RV hookups. One of the most frequent errors is using the wrong adapter, which can lead to power issues or even damage. Always ensure your adapter matches the campsite’s outlet and your RV’s electrical system. Overloading circuits is another common mistake; never exceed the rated capacity of your RV’s electrical components. Improper grounding can also pose serious safety risks, so always verify that your system is correctly grounded. Additionally, neglecting regular inspections of power cables and connections can result in hazards like fires or electrical failures. To prevent these issues, always follow a pre-hookup checklist and consult a professional if unsure. Prioritizing safety and awareness will help you avoid these costly and dangerous mistakes during your RV adventures.

Troubleshooting Common Issues
Identify and resolve electrical issues quickly with a PDF troubleshooting guide. Address tripped breakers, low voltage, and faulty connections. Regular inspections and proper tools ensure reliable RV hookups.
Diagnosing Electrical Problems in Your RV
Diagnosing electrical issues in your RV begins with a systematic approach. Start by reviewing the RV electrical setup checklist to ensure all connections are secure. Check for tripped breakers or blown fuses, as these are common causes of power loss. Use a multimeter to test voltage levels at outlets and connectors, ensuring they match the required specifications. Inspect power cords and adapters for damage or corrosion, as these can disrupt the electrical flow. Consult your RV manual or a downloadable PDF guide for specific troubleshooting steps tailored to your system. Regular inspections and maintenance can prevent many issues, while a printable RV checklist helps track your progress. Always prioritize safety when working with electricity to avoid hazards. By following these steps, you can identify and resolve electrical problems efficiently, ensuring a reliable power supply for your RV adventures.

Fixing Tripped Breakers and Fuses
Fixing tripped breakers or blown fuses in your RV requires careful attention to detail. First, identify the source of the issue by checking the electrical panel. If a breaker has tripped, switch it off and then back on. For a blown fuse, replace it with one of the same amperage rating. Always disconnect power sources before handling electrical components. Refer to your RV manual or a downloadable PDF guide for specific instructions. Use a multimeter to test for short circuits or overloaded circuits. Regularly inspecting your electrical system and adhering to the RV setup checklist can help prevent future issues. Remember to prioritize safety to avoid electrical hazards. By following these steps, you can restore power quickly and ensure a reliable electrical connection for your RV.
Dealing with Low Voltage Issues
Low voltage issues in your RV can cause inconvenience and potential damage to appliances. Start by identifying the source using a multimeter to check voltage levels at the power source and RV connection. Ensure all appliances are turned off before plugging in to prevent power spikes. Consider using a voltage booster if the campsite’s power is consistently low. A surge protector can help monitor and stabilize the voltage. Regularly inspect your power cables and adapters for damage or wear. Refer to your RV manual or a downloadable PDF guide for troubleshooting steps. Prioritize appliance usage to avoid overloading the electrical system. By addressing low voltage proactively, you can maintain a stable power supply and ensure safe, reliable operation of your RV’s electrical system while camping.
Resetting Your RV Electrical System
Resetting your RV electrical system is crucial after experiencing issues like tripped breakers or low voltage. Start by locating the circuit breaker or fuse box, typically found near the power source. Switch the main breaker to the “OFF” position and wait a few minutes before turning it back “ON.” This resets the system and restores power. If issues persist, check for loose connections or damaged components. Use a multimeter to verify voltage levels and ensure they match the RV’s requirements. Regularly inspecting your electrical system can prevent future problems. Always refer to your RV’s manual or a downloadable PDF guide for specific instructions tailored to your model; Proper reset procedures ensure safe and reliable operation of your RV’s electrical setup while camping.
Downloadable RV Setup Checklist
Download a comprehensive RV setup checklist in PDF format to ensure a smooth camping experience. Includes arrival procedures, leveling, hookups, and indoor setup essentials for easy reference.

Printable RV Packing Essentials List
A well-organized RV packing list ensures you never forget crucial items for your trip. Download a printable PDF checklist tailored for RV camping, covering essential categories like power adapters, water hoses, safety gear, and personal amenities. This list helps you prepare efficiently, avoiding last-minute stress. Categories include:
- Electrical adapters and cables
- Water and sewer hookup essentials
- Tool kit and spare parts
- Safety equipment (fire extinguisher, first aid kit)
- Personal items (bedding, toiletries)
Print and laminate the list for easy reuse on every trip, ensuring a smooth and enjoyable RV experience. Download now and stay organized for your next adventure!
RV Camping Setup Checklist
A comprehensive RV camping setup checklist ensures a smooth and stress-free experience. Start with pre-arrival tasks like scouting your campsite and disconnecting your tow vehicle. Upon arrival, focus on leveling your RV, chocking wheels, and positioning within reach of hookups. Next, connect to power, water, and sewer systems, ensuring all hoses and cables are secure. Extend slide-outs and deploy stabilizers for stability. Finally, perform a safety check, test all appliances, and organize indoor spaces. Don’t forget to verify circuit breakers and water pressure regulators. For first-timers, a step-by-step PDF checklist is invaluable, covering everything from electrical hookups to waste management. Download and print your checklist today to streamline your RV camping setup process!
Arrival and Pre-Setup Checklist
Upon arriving at your campsite, begin with a thorough pre-setup checklist to ensure a safe and efficient RV hookup process. First, check in at the campground office and receive your assigned site. Next, scout your site to confirm its suitability, checking for obstacles and ensuring proper alignment with hookups. Disconnect your tow vehicle if applicable, and position your RV within reach of power, water, and sewer connections. Level your RV using blocks or stabilizers, and chock the wheels for stability. Perform a visual inspection of all cables and hoses, ensuring they are undamaged and ready for use. Finally, turn off the main breaker at the electrical pedestal before connecting your power cable. Download a printable arrival checklist PDF to keep track of these essential steps and ensure a smooth setup process.
Indoor RV Procedures Checklist
After completing the exterior setup, focus on your indoor RV procedures to ensure comfort and functionality. Start by testing all interior lights and appliances to confirm they are working properly. Check the circuit breakers and ensure the power source is stable. Secure all cabinets and drawers to prevent items from shifting during travel. Test the plumbing system by running water through the faucets and checking for leaks. Ensure the propane tank is turned on and all gas-powered appliances are functioning correctly. Finally, organize your living space, including bedding, kitchen utensils, and electronics. For a detailed guide, download our Indoor RV Procedures Checklist PDF to streamline your setup process and enjoy a hassle-free camping experience.
Final Thoughts on RV Electrical Hookups
Setting up your RV’s electrical system correctly is crucial for a safe and enjoyable camping experience. Always use the right adapters and regularly inspect your power cables to prevent issues. Download our PDF checklist to ensure you never miss a step. Remember, proper hookups protect your RV and ensure all systems function smoothly. By following these guidelines, you can enjoy your adventures with confidence. Stay organized, stay safe, and make the most of your RV journeys with a well-planned electrical setup. Happy camping!
Encouragement for Safe and Enjoyable RVing
RVing is a fantastic way to explore the world, but safety and preparation are key to making your adventures enjoyable. Always follow proper electrical hookup procedures and use the right adapters to avoid damage or hazards. Regular inspections of your power cables and system ensure reliability. By staying organized with a printable RV setup checklist, you can focus on the fun aspects of camping. Remember, a well-maintained RV electrical system means less stress and more time to enjoy nature and relaxation. Embrace the freedom of RVing with confidence, knowing you’ve taken the steps to ensure a safe and memorable journey. Happy travels!