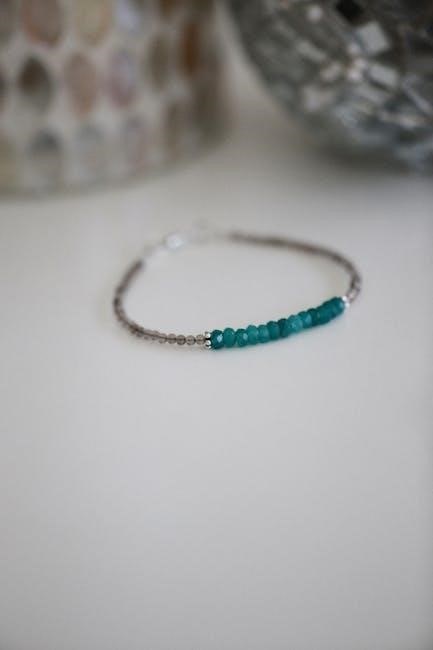
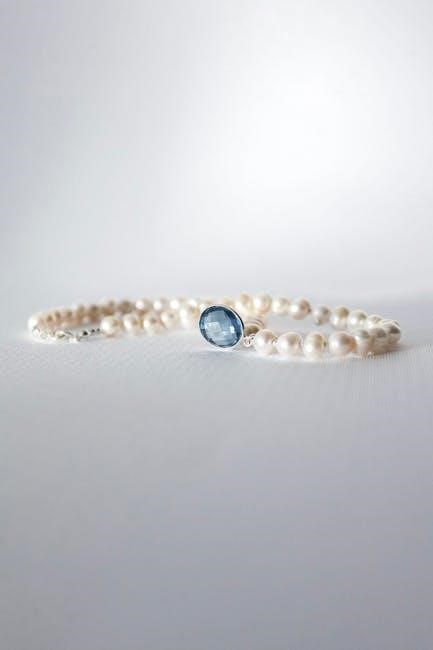
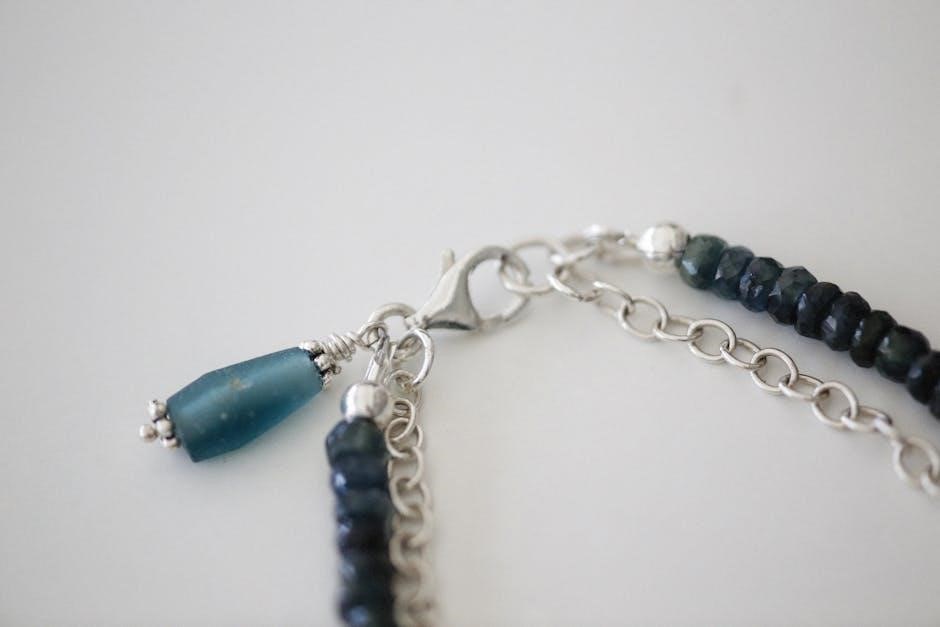
Tila bead bracelets are a popular and elegant DIY jewelry project‚ offering versatility and style. These flat‚ square beads with two holes create stunning‚ modern designs‚ perfect for gifts or personal wear.
What Are Tila Beads?
Tila beads are flat‚ square-shaped glass beads with two holes‚ typically produced by Miyuki‚ a renowned Japanese bead manufacturer. Their dual-hole design allows for versatile beadwork‚ making them ideal for intricate patterns and modern jewelry designs. These beads are popular in DIY projects due to their ease of use and aesthetic appeal. Tila beads come in various colors and finishes‚ offering endless creative possibilities for crafting unique bracelets and accessories. Their square shape and smooth edges make them comfortable to wear and visually striking‚ perfect for both casual and elegant jewelry pieces.
Popularity of Tila Bead Jewelry
Tila bead jewelry has gained immense popularity due to its modern‚ elegant designs and versatility in DIY projects. Crafters and jewelry makers love Tila beads for their unique dual-hole system‚ which allows for creative patterns and intricate designs. These beads are ideal for beginners and experienced artisans alike‚ making them a favorite in beadwork communities. Their flat‚ square shape and wide range of colors enable the creation of trendy‚ stackable bracelets and seasonal designs. Tila bead bracelets are also perfect for gifting‚ contributing to their widespread appeal. This popularity has made Tila beads a staple in jewelry-making tutorials and DIY trends.
Why Make Your Own Tila Bead Bracelet?
Creating your own Tila bead bracelet allows for personalization and creativity‚ making it a fun and rewarding DIY project. With Tila beads‚ you can customize colors‚ patterns‚ and designs to match your style or occasion. The process is both therapeutic and empowering‚ enabling you to craft something truly unique. It’s also a great way to save money and create meaningful gifts. Whether you’re a beginner or an experienced crafter‚ making your own Tila bead bracelet offers endless possibilities for self-expression and artistic fulfillment. This hands-on approach ensures your jewelry is one-of-a-kind‚ reflecting your individuality and creativity.
Materials Needed
Tila beads‚ stretch cord‚ bead spinner‚ scissors‚ and elastic beading cord are essential for creating a Tila bead bracelet. These materials ensure durability and a polished finish.
Tila Beads: Types and Sizes
Tila beads are flat‚ square-shaped beads with two holes‚ available in various sizes such as 5x5mm and 3x3mm. Miyuki Tila beads are the most popular‚ offering a wide range of colors and finishes. Half Tila and Quarter Tila beads provide additional design versatility‚ allowing for intricate patterns and layered looks. Their dual-hole feature makes them ideal for weaving and stringing techniques. Whether you prefer bold statements or delicate accents‚ Tila beads come in sizes and types to suit every style‚ from minimalist designs to elaborate bead weaving projects.
Stretch Cord: Choosing the Right Quality
Choosing the right stretch cord is crucial for a durable and comfortable Tila bead bracelet. Opt for high-quality options like Miyuki Elastic Beading Cord or .5mm Stretch Magic‚ known for their smooth texture and strength. The cord should be flexible yet sturdy to withstand regular wear. For a standard bracelet‚ cut two strands of 16-18 inches each‚ ensuring a snug fit. Avoid thin or poor-quality cords‚ as they may break easily. Selecting the right thickness‚ such as 0.5mm‚ ensures the bracelet is neither too tight nor too loose‚ providing a secure and long-lasting finish to your handmade jewelry.
Basic Tools: Scissors‚ Bead Spinner‚ and More
The essential tools for making Tila bead bracelets include sharp scissors for cutting stretch cord‚ a bead spinner for efficiently threading beads‚ and a clean‚ stable workspace. Scissors should be dedicated solely for cutting beading materials to maintain their precision. A bead spinner simplifies the process of transferring beads onto the cord‚ saving time and reducing tangles. Optional tools like a beading mat or tray can help keep beads organized and prevent them from rolling away. Having these basics on hand ensures a smooth and enjoyable bracelet-making experience‚ allowing you to focus on creativity and precision.
Basic Techniques
Mastering basic techniques like understanding the two-hole system‚ using a bead spinner‚ and essential knots ensures a secure and professional finish for your Tila bead bracelet.
Understanding the Two-Hole System
Miyuki Tila beads feature two parallel holes‚ allowing for versatile stringing and secure connections. This system enables beads to lie flat‚ creating a durable and professional finish. By threading cord through both holes‚ bracelets resist stretching and maintain structural integrity. The two-hole design is ideal for patterns like the Nexus‚ ensuring consistent spacing and alignment. Properly utilizing this system prevents bead rotation and enhances the overall aesthetic. Always thread beads from the same side for a uniform look. This technique is essential for creating stylish‚ long-lasting Tila bead bracelets.
Essential Knots for Beading
Mastering essential knots is crucial for securing your Tila bead bracelet. The surgeon’s knot is a reliable choice for joining stretch cord ends‚ ensuring a strong and durable bond. Begin by overlapping the cords‚ then wrap one around the other twice before passing through the loop. Pull tightly to form a compact knot. For added security‚ trim excess cord closely. Consistent knotting ensures your bracelet remains intact. Properly tied knots prevent beads from shifting and maintain the bracelet’s structural integrity. Always test the knot’s strength before wearing to ensure a professional finish and long-lasting wear.
How to Use a Bead Spinner
Using a bead spinner simplifies the process of threading Tila beads onto your stretch cord. Begin by placing the beads onto the spinner’s spool‚ ensuring they are evenly distributed. Gently spin the spool to thread the beads onto the cord. This tool helps maintain bead alignment and prevents tangling. Once beads are threaded‚ carefully remove the cord from the spinner and secure the ends. The bead spinner is especially useful for large projects or intricate designs‚ saving time and reducing frustration. It ensures beads are consistently spaced and aligned‚ resulting in a polished‚ professional-looking bracelet.

Step-by-Step Tutorial
Begin by cutting two 12-inch strands of stretch cord and tying the ends together. Use a bead spinner to thread Tila beads efficiently‚ ensuring proper alignment. String beads by threading both cord strands through each bead’s holes for a secure fit. Finally‚ tie knots at the ends to fasten the bracelet‚ ensuring it is neither too tight nor too loose for a comfortable wear.
Preparing the Beads
Start by organizing your Tila beads and ensuring they are ready for stringing. Use a bead spinner to effortlessly transfer beads onto your stretch cord‚ saving time and effort. For a standard bracelet‚ measure and cut two strands of stretch cord‚ each approximately 12 inches long. Tie a small knot at one end of both strands to prevent beads from slipping off. This step ensures a secure base for your design. Optionally‚ add a dab of glue to the knot for extra durability. Trim excess cord with sharp scissors for a clean finish before proceeding to string your beads.
Starting the Bracelet
Begin by cutting two strands of stretch cord‚ each approximately 12 inches long. Tie a small knot at one end of both strands to prevent beads from slipping off. This forms the base of your bracelet. For added security‚ apply a dab of glue to the knots and let it dry. Next‚ align the two strands and start stringing your Tila beads‚ ensuring they sit evenly. Use a bead spinner to load the beads onto the cord efficiently. Once the beads are in place‚ gently pull the cord to tighten the bracelet slightly‚ preparing it for the next steps in your design.
Stringing the Beads
Once your bracelet is started‚ carefully thread the Tila beads onto both strands of stretch cord. Ensure the beads are evenly spaced and aligned. Use a bead spinner to load the beads quickly and efficiently. As you string‚ gently pull the cord to maintain even tension‚ preventing the beads from sliding too loosely or bunching too tightly. For a uniform look‚ alternate beads or follow a pattern if desired. Make sure the beads lie flat and the design remains balanced. This step is crucial for achieving a professional finish and a comfortable fit for the wearer.
Securing the Ends
To complete your bracelet‚ tie both strands of stretch cord together in a secure knot. Trim the excess cord close to the knot for a clean finish. For added durability‚ apply a small dab of clear glue to the knot. Allow it to dry completely before handling. This ensures the bracelet stays intact and prevents the beads from coming loose over time. Properly securing the ends is essential for a professional-looking piece. Make sure the knot is snug but not overly tight‚ as this could cause discomfort or distortion to the beads. Patience here ensures a long-lasting‚ polished design.

Design Variations
Explore creative possibilities with single-strand simplicity‚ multi-strand statements‚ vibrant color patterns‚ or by mixing Tila beads with other bead types for unique‚ personalized designs that reflect your style.
Single-Strand vs. Multi-Strand
A single-strand bracelet offers simplicity and elegance‚ perfect for subtle styles‚ while multi-strand designs create bold‚ layered looks. Single-strand bracelets often feature a clean‚ minimalist aesthetic‚ making them ideal for everyday wear. Multi-strand bracelets‚ on the other hand‚ allow for creativity and texture by combining multiple strands of Tila beads‚ which can be woven or knotted together. Both styles are versatile and can be customized with color patterns or embellishments.single-strand bracelets are great for showcasing intricate beadwork‚ while multi-strand designs add volume and visual interest‚ making them a statement piece.
Adding Color Patterns
Adding color patterns to your Tila bead bracelet enhances its visual appeal and personalizes the design. You can create monochromatic looks for a sleek finish or mix complementary colors for a vibrant effect. Using a bead spinner helps organize beads by color before stringing. Alternate colors in a repeated sequence or gradient for a dynamic look. Seasonal themes‚ like pastels for spring or bold tones for winter‚ add uniqueness. experiment with layering or contrasting hues to create intricate designs. balancing warm and cool tones can elevate the bracelet’s aesthetic. color patterns allow you to express your style and make each piece truly one-of-a-kind.
Incorporating Other Bead Types
Incorporating other bead types into your Tila bead bracelet adds texture and dimension. Try mixing Tila beads with seed beads for intricate details or bugle beads for a dramatic effect. Miyuki Half Tila beads can be paired with square beads for a cohesive look. Consider adding charm beads or spacer beads to introduce new elements. Experimenting with bead shapes and sizes creates unique designs. For example‚ combining Tila beads with glass beads or crystals enhances the bracelet’s sparkle. This technique allows you to explore diverse styles‚ from simple to elaborate‚ making each bracelet a one-of-a-kind piece of jewelry.
Advanced Techniques
Elevate your Tila bead bracelet craft with advanced techniques like bead weaving‚ Nexus patterns‚ and using Miyuki Elastic Beading Cord for professional-quality designs. Expand your creative possibilities.
Using Miyuki Elastic Beading Cord
Miyuki Elastic Beading Cord is a premium choice for creating durable and professional-looking Tila bead bracelets. Cut two strands of 16-18 inches‚ tie the ends securely‚ and thread Tila beads through both strands. This method ensures a comfortable fit and prevents stretching. Use a bead spinner to efficiently transfer beads onto the cord. For a polished finish‚ tie knots at the ends and trim excess cord. This technique is ideal for stackable or intricate designs‚ offering a sleek and modern look to your handmade jewelry.
Bead Weaving with Tila Beads
Bead weaving with Tila beads offers a creative way to craft intricate designs. Using a bead spinner‚ transfer beads onto the spool for easy threading. Start by forming a basic loop with wire‚ leaving a 3-inch tail. Weave the Tila beads into patterns‚ incorporating seed beads or bugle beads for added texture. This technique allows for complex designs like the Half Nexus pattern‚ combining Tila beads with other materials. Bead weaving is perfect for creating durable‚ multi-dimensional bracelets. With practice‚ you can achieve professional-looking results‚ making it a great method for both beginners and experienced crafters to explore.
Creating a Nexus Pattern
Creating a Nexus pattern with Tila beads is a popular technique for crafting modern‚ intricate designs. This method involves weaving beads into a grid-like structure‚ often combining Tila beads with seed beads or bugle beads. Start by threading beads onto a wire or cord‚ using a bead spinner for efficiency. Form a loop at one end and begin weaving the beads into the desired pattern. The Nexus design emphasizes symmetry and visual appeal‚ making it ideal for statement bracelets. Perfect for both casual and formal wear‚ this pattern showcases the versatility of Tila beads in creating unique‚ eye-catching jewelry pieces.

Customization
Customize your Tila bead bracelet by choosing vibrant colors‚ adding embellishments‚ or adjusting lengths. Personalize the design to match your style‚ creating unique‚ eye-catching jewelry pieces easily.
Choosing the Right Colors
Selecting the perfect colors for your Tila bead bracelet is essential for creating a personalized and stylish piece. Consider complementary color schemes or monochromatic tones to achieve a cohesive look. Seasonal hues‚ like pastels for spring or deep tones for winter‚ can add a timely touch. Additionally‚ think about the psychological impact of colors—cool tones for calmness or bold shades for energy. Use a color wheel to explore harmonious combinations. For a modern twist‚ mix metallic and matte finishes. Remember‚ the color palette sets the mood of your bracelet‚ making it uniquely yours or a thoughtful gift for someone special.
Adding Embellishments
Embellishments can elevate your Tila bead bracelet‚ adding texture and visual interest. Consider adding small charms‚ sequins‚ or crystals between Tila beads for a personalized touch. Use jump rings or head pins to attach charms‚ ensuring they dangle elegantly. For a subtle look‚ incorporate seed beads or bugle beads as spacers. Glue-on findings like rhinestones or cabochons can also enhance the design. When adding embellishments‚ balance is key—over-accessorizing can overwhelm the bracelet. Experiment with different placements to create a focal point or maintain symmetry. Embellishments allow you to express your creativity‚ making your bracelet truly unique and eye-catching.
Adjusting the Length
Adjusting the length of your Tila bead bracelet ensures a perfect fit. Measure your wrist and add about 1-2 inches for comfort. Cut the stretch cord accordingly‚ leaving extra for knotting. When stringing beads‚ ensure the bracelet isn’t too tight or too loose. Use a bead spinner to organize beads efficiently. After stringing‚ tie a secure knot and trim excess cord. For stretchy bracelets‚ the elasticity of the cord allows for easy on-and-off wear. Proper length adjustment ensures durability and comfort‚ making your bracelet both stylish and practical. This step is crucial for a professional finish and lasting wearability.

Tips and Tricks
- Use a bead spinner to organize beads efficiently.
- Keep even tension while stringing to prevent stretching.
- Secure knots with a dab of glue for durability.
Common Mistakes to Avoid
When making Tila bead bracelets‚ avoid common mistakes like uneven tension‚ which can cause stretching or breakage. Over-tightening knots can damage the cord‚ while loose knots may come undone. Ensure beads are properly aligned to maintain the bracelet’s symmetry. Avoid using low-quality stretch cord‚ as it may lose elasticity. Incorrect bead placement can disrupt the pattern‚ so double-check your design. Lastly‚ not trimming excess cord neatly can leave a messy finish. By being mindful of these pitfalls‚ you can create a professional-looking bracelet that lasts.
Optimizing Bead Placement
Optimizing bead placement is key to creating a polished Tila bead bracelet. Start by planning your design to ensure symmetry and balance. Use a bead spinner to organize beads before stringing‚ which helps maintain even spacing. When threading beads‚ align them carefully to avoid overcrowding or gaps. Regularly check the bracelet as you progress to ensure beads lie flat and straight. Avoid twisting the beads‚ as this can disrupt the pattern. For multi-strand designs‚ ensure each strand aligns properly with the others. Finally‚ use high-quality beads and cord to prevent unevenness and enhance the overall appearance of your bracelet.
Speeding Up the Process
To speed up your Tila bead bracelet-making process‚ consider using a bead spinner to quickly transfer beads onto your cord. Pre-threading beads in the order of your design can save significant time. Measure and cut the exact length of cord needed beforehand to avoid adjustments later. Keeping all tools and materials organized within reach ensures efficiency. Practice the basic techniques‚ such as knotting and bead placement‚ to work more smoothly. Watching tutorials or patterns beforehand can also help you anticipate steps‚ reducing pauses during creation. With repetition‚ your workflow will become faster and more streamlined.

Caring for Your Bracelet
Keep your Tila bead bracelet clean by gently wiping with a soft cloth and mild soap. Avoid harsh chemicals or prolonged water exposure to maintain its shine and durability. Store it separately in a protective pouch or box to prevent tangling or damage. Regularly check and tighten knots to ensure longevity and security of the design. Proper care will keep your bracelet looking stunning for years to come.
Cleaning and Maintenance
To keep your Tila bead bracelet in pristine condition‚ gently clean it with a soft cloth and mild soap solution. Avoid harsh chemicals or prolonged water exposure‚ as this may damage the beads or weaken the cord. For stubborn stains‚ lightly dab the area with a damp cloth. Regularly inspect the bracelet for loose beads or frayed cord ends. To maintain shine‚ buff the beads with a polishing cloth. Cleaning should be done sparingly to prevent wear. By following these steps‚ you can preserve the beauty and longevity of your Tila bead bracelet.
Storing Your Jewelry
To maintain the quality of your Tila bead bracelet‚ store it in a cool‚ dry place away from direct sunlight. Use a soft‚ padded pouch or jewelry box to protect the beads from scratching. Avoid stacking multiple bracelets‚ as this could cause pressure damage or tangling. If using a stretch cord‚ store the bracelet flat to prevent stretching or distortion. For added protection‚ separate each piece of jewelry with tissue paper or individual compartments. Proper storage will help preserve the beads’ luster and ensure your bracelet remains intact for years to come.
Repairing Damaged Bracelets
If your Tila bead bracelet becomes damaged‚ start by assessing the issue. For stretched or broken cords‚ carefully remove the beads using a bead spinner or by sliding them off. Re-string the beads onto a new stretch cord‚ ensuring tight knots for security. If beads are chipped or discolored‚ replace them with new ones. For loose connections‚ apply a small amount of clear adhesive to secure the beads. After repairs‚ gently stretch the bracelet to ensure flexibility. Regular inspections can prevent further damage. With proper care‚ your Tila bead bracelet will remain a beautiful accessory for years to come.

Inspiration and Ideas
Discover endless inspiration with Tila bead bracelets! Create seasonal designs‚ stackable styles‚ or personalized gifts. Explore color patterns and unique bead combinations to express your creativity.
Seasonal and Holiday Designs
Tila bead bracelets are perfect for celebrating seasons and holidays! Create Christmas designs with red and green beads‚ Halloween styles with orange and black‚ or Easter themes with pastel colors. Summer bracelets can feature bright‚ vibrant hues‚ while winter designs might include icy blues and silvers. Use holiday-themed beads or charms to add a festive touch. These bracelets make great gifts for loved ones during special occasions. Experiment with patterns and colors to match the spirit of each holiday‚ making each piece unique and meaningful. Let your creativity shine by crafting bracelets that reflect the beauty of every season and celebration.
Stackable Bracelet Trends
Stackable bracelet trends are a popular way to showcase Tila beads! Layering multiple thin bracelets creates a chic‚ modern look. Use Tila beads in various colors and patterns to craft each strand uniquely. For a cohesive style‚ mix single-strand and multi-strand designs. Incorporate Miyuki elastic beading cord for a stretchy‚ secure fit. Add embellishments like charms or seed beads for texture. Experiment with different bead counts and lengths to customize the stack. This trend allows for endless creativity‚ making it easy to match your personal style or seasonal outfits. Stackable Tila bead bracelets are perfect for gifting or adding a trendy touch to your jewelry collection.
Unique Gift Ideas
Tila bead bracelets make thoughtful and personalized gifts! Customize them with colors and patterns to match the recipient’s style or favorite hues. Create seasonal designs‚ like holiday-themed bracelets‚ for festive occasions. Pair a single-strand bracelet with a stackable set for a chic gift combination. Consider adding a handwritten note or care instructions for a personal touch. DIY Tila bead bracelets are easy to craft‚ making them ideal for handmade gift exchanges. They’re perfect for birthdays‚ anniversaries‚ or as a token of appreciation. The versatility of Tila beads ensures your gift will be both unique and cherished‚ no matter the recipient’s taste or preference.

