
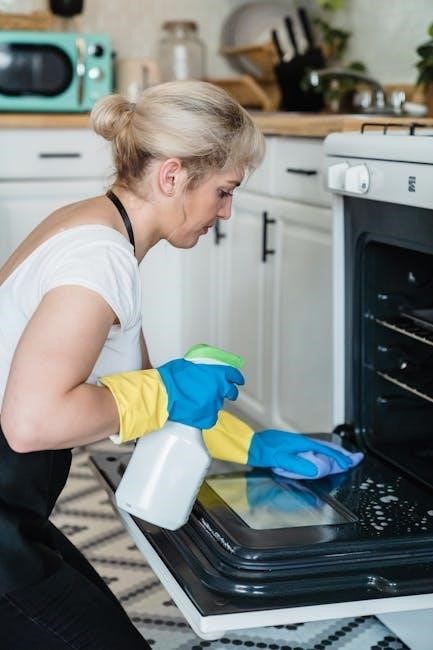
GE self-cleaning ovens offer a convenient and efficient way to maintain your appliance. Using high-heat technology, these ovens burn away food residue, leaving behind a clean surface. With features like smart home integration and safety locks, GE ovens provide innovative solutions for modern kitchens, ensuring a spotless finish with minimal effort.
What Is a Self-Cleaning Oven?
A self-cleaning oven is a modern appliance designed to simplify maintenance by using high-heat cycles to burn food residue into ash. GE models feature advanced technology, including a self-cleaning latch and smart connectivity, allowing users to initiate cycles remotely via the SmartHQ app. This innovative design minimizes effort, as the oven does the work, leaving only ash to wipe away. It’s a convenient solution for busy households, ensuring a clean oven with minimal manual labor required.
Benefits of Using a Self-Cleaning Oven
Using a self-cleaning oven offers numerous advantages, including reduced manual labor and time. The high-heat cycle eliminates tough stains and food residue, leaving the oven spotless without scrubbing. This feature is eco-friendly, minimizing the need for harsh chemicals. GE ovens also integrate smart technology, allowing remote monitoring through the SmartHQ app. Additionally, self-cleaning ovens maintain hygiene by removing bacteria and odors, ensuring a safer cooking environment. Regular use extends the oven’s lifespan by preventing grime buildup, making it a practical choice for modern kitchens seeking efficiency and convenience.
Safety Precautions Before Using the Self-Cleaning Feature
Ensure the oven is empty and racks are removed. Provide proper ventilation to avoid fumes. Keep flammable materials away and avoid storing items inside the oven during cleaning.
Personal Safety Measures
Ensure proper ventilation by opening windows and using an exhaust fan to prevent fumes. Wear heat-resistant gloves and goggles when handling the oven post-cleaning. Avoid wearing loose clothing near the oven during the cycle. Keep children and pets away from the oven while it is in use. Never leave the kitchen unattended during the self-cleaning process. Protect your skin from burns by avoiding direct contact with hot surfaces. Always turn off the oven and allow it to cool before approaching it. Stay alert to avoid accidents caused by high heat or fumes;
Proper Ventilation Requirements
Ensure adequate ventilation before starting the self-cleaning cycle to prevent fumes from accumulating. Open windows and doors to allow fresh air circulation. Activate your kitchen exhaust fan to vent out smoke and odors. Avoid using recirculating fans, as they may spread fumes. If your oven is connected to a vent system, confirm it’s functioning properly and directs air outside. Proper ventilation helps reduce the risk of inhaling harmful fumes and keeps your kitchen safe during the cleaning process. Monitor the area to ensure fumes do not linger excessively.
Protecting Your Kitchen from Heat and Fumes
Protect your kitchen from excessive heat and fumes during the self-cleaning cycle by taking proactive steps. Turn off the circuit breaker to allow the oven to cool before starting. Cover countertops and flooring with heat-resistant materials to prevent damage. Remove flammable items from the vicinity and ensure the area is clear. Use exhaust fans and open windows to ventilate the space. Avoid lingering in the kitchen during the cycle to minimize exposure to fumes. Keep a fire extinguisher nearby as a precaution. GE ovens are designed with safety features, but additional precautions ensure a safe cleaning process. Always monitor the kitchen and follow the owner’s manual guidelines for optimal safety.
Preparing Your Oven for Self-Cleaning
Remove racks and accessories, clean heavy debris, and ensure the oven is empty. Allow it to cool completely before starting the self-cleaning cycle for optimal results.
Removing Racks and Accessories
Before initiating the self-cleaning cycle, remove all racks, shelves, and accessories from the oven. This prevents damage from high temperatures and ensures thorough cleaning. Place racks in a safe location, away from heat. Check the owner’s manual for specific parts that must be removed. Leaving racks inside can cause warping or discoloration. Ensure no accessories remain, as they may interfere with the cleaning process or sustain damage. This step is essential for both safety and effective cleaning results.
Cleaning Heavy Debris Before Starting the Cycle
Before activating the self-cleaning feature, remove large food particles from the oven floor. Use a soft brush or paper towels to wipe away debris. Avoid using harsh chemicals or abrasive cleaners, as they can leave residue. Do not add water, as it may create excessive steam during the cycle. For heavy buildup, manually scrape off excess food bits with a plastic scraper. This step ensures the self-cleaning process works efficiently and prevents unpleasant odors or smoke. Proper preparation helps achieve a cleaner oven with minimal effort.
Ensuring the Oven Is Empty
Before starting the self-cleaning cycle, ensure the oven is completely empty. Remove all racks, baking sheets, cookware, and utensils to prevent damage from high heat. Do not leave food or debris inside, as this can create smoke or unpleasant odors. Double-check for any overlooked items, such as oven mitts or foil liners, and remove them. An empty oven ensures the self-cleaning process works effectively and safely. For extra protection, place foil catchers outside the oven to catch any falling residue during the cycle.
Allowing the Oven to Cool Completely
Allowing the oven to cool completely is crucial before and after the self-cleaning cycle. Let it cool for at least 90 minutes to two hours to avoid burns or damage. Never open the door during this time, as high heat can cause injury or release harmful fumes. If the oven is still too hot, consider turning off the circuit breaker to ensure safety. Proper cooling ensures the self-cleaning process is effective and prevents potential damage to internal components or surrounding surfaces.
Operating the Self-Cleaning Feature
GE self-cleaning ovens simplify maintenance by using high heat to burn food residue. Start by latching the door securely, then set the temperature knob to “clean.” The cycle typically runs for 4-5 hours, turning residue into ash. After activation, the oven locks automatically for safety. Ensure proper ventilation and avoid disturbances during the process for optimal results.
Step-by-Step Instructions to Activate the Self-Cleaning Cycle
Ensure the oven is empty and all racks are removed. Clean large debris beforehand.
Close and latch the oven door securely.
Navigate to the self-cleaning option on the control panel and select it.
Choose the desired temperature and set the cycle duration, typically 4-5 hours.
Confirm your settings and start the cycle.
Keep the kitchen well-ventilated to prevent fumes from building up.
Avoid opening the oven during the cycle as it will be locked.
Allow the oven to cool completely before unlatching the door or cleaning up residue.
Selecting the Correct Cleaning Time and Temperature
Choose the cleaning time and temperature based on the level of soil inside your oven. Light buildup may require 2-3 hours at 600-700°F, while heavy buildup needs 4-5 hours at 800-900°F. Use the control panel to set these parameters. Avoid exceeding the recommended temperature to prevent damage. Always refer to your owner’s manual for specific guidance tailored to your GE model.
Starting the Self-Cleaning Cycle
To start the self-cleaning cycle, ensure the oven is properly prepared and empty. Set the desired cleaning time and temperature using the control panel. Once confirmed, the oven will automatically lock the door for safety. The cycle cannot be interrupted once started, so ensure all settings are correct. The high heat will burn food residue into ash. Keep the kitchen well-ventilated to manage fumes. Let the oven cool completely before opening the door or wiping down the interior.
Monitoring the Cleaning Process
Once the self-cleaning cycle begins, monitor the process to ensure it runs smoothly. Check that the oven is set to the correct time and temperature. Do not open the door during cleaning, as the high heat and locked mechanism are crucial for safety. Stay nearby to address any unexpected issues, such as unusual odors or sounds. The oven will remain locked until it cools down, so avoid forcing the door open. Proper monitoring ensures effective cleaning and prevents potential damage to the appliance.
Allowing the Oven to Cool After the Cycle
After the self-cleaning cycle finishes, it’s essential to let the oven cool completely before handling it. The oven will remain locked until it has cooled down to a safe temperature, typically taking several hours. Avoid attempting to open the door or touch internal components, as they remain extremely hot. This cooling period is crucial for safety and ensures the oven’s components are not damaged. Once the oven has cooled, you can safely remove ash and wipe down the interior for a clean finish.
Post-Cleaning Steps
After the cycle, let the oven cool completely. Wear gloves to handle racks and dispose of ash safely. Wipe the interior with a damp cloth and clean racks separately. Seasonal maintenance ensures optimal performance.
Wearing Protective Gear to Handle the Oven
After the self-cleaning cycle, wear heat-resistant gloves and safety goggles to protect yourself from sharp debris and residual heat. A long-sleeved apron can also shield your clothing. Ensure the oven is completely cool before handling racks or cleaning the interior. This precautionary step prevents burns and injuries, making the post-cleaning process safer and more efficient. Always prioritize safety when interacting with the oven, even after it has cooled down significantly. Proper protective gear ensures a secure and hassle-free cleaning experience.
Wiping Down the Oven Interior
After the self-cleaning cycle, allow the oven to cool completely. Use a damp cloth to wipe away ash and residue, working gently to avoid scratching the surfaces. For stubborn spots, mix water with a mild detergent and apply it to the area, letting it sit briefly before wiping clean. Avoid using harsh chemicals or abrasive cleaners, as they can damage the oven’s finish. For racks, scrub them separately with soap and warm water before returning them to the oven. This step ensures a spotless and safe cooking environment.
Disposing of Ash and Residue Safely
After the self-cleaning cycle, allow the oven to cool completely. Wearing gloves and a mask, carefully sweep the ash into a sealed container using a damp cloth to prevent dust. For eco-friendly disposal, check if the ash is safe for composting, typically organic matter can be composted. If not, dispose of it in a sealed bag in regular trash, adhering to local waste regulations. Avoid using harsh chemicals to prevent environmental contamination. Always consult the owner’s manual for specific guidelines and ensure compliance with local disposal laws to maintain environmental safety.
Cleaning the Oven Racks and Accessories
After the self-cleaning cycle, remove racks and accessories. Scrub them with soapy water or a mixture of baking soda and water. For tough stains, soak overnight. Rinse thoroughly and dry. For heavy buildup, use a gentle scrubber or vinegar solution. Avoid harsh chemicals to prevent damage. Once clean, allow racks to air dry before placing them back in the oven. Regular cleaning prevents food residue from hardening, ensuring racks remain in good condition and maintain oven performance. Always refer to the owner’s manual for specific care instructions.
Seasonal Maintenance Tips
Regularly clean your GE oven to prevent food buildup. Use the self-cleaning feature before major cooking events, like holidays. Check racks and accessories for wear and tear. Ensure the oven door seal is tight to maintain heat efficiency. For tougher stains, use a gentle cleanser and avoid harsh chemicals. During seasonal transitions, deep clean the oven to remove leftover residue; Refer to the owner’s manual for tailored maintenance schedules. Pairing your oven with the SmartHQ app allows remote monitoring and timely maintenance reminders, ensuring optimal performance year-round.

Common Issues and Troubleshooting
Common issues include the self-cleaning feature failing to start or uneven cleaning results. Consult the owner’s manual or GE customer support for troubleshooting solutions to resolve these problems effectively.
What to Do If the Self-Cleaning Feature Fails to Start
If the self-cleaning feature fails to start, ensure the oven door is properly latched and the cycle is set correctly; Check the circuit breaker or power supply. Clear any blockages and verify the oven is empty. If issues persist, reset the oven or consult the owner’s manual for troubleshooting steps. Contact GE customer support if the problem remains unresolved. Always follow safety guidelines and avoid forcing the door open during this process.
Addressing Uneven Cleaning Results
If your GE self-cleaning oven leaves uneven results, ensure heavy debris was removed before starting the cycle. Check for obstructions like racks or accessories that may block heat distribution. For tough stains, manual cleaning with a gentle scrubber or mild cleaner can help. After the cycle, wipe down the interior with a damp cloth to remove ash. Avoid using harsh chemicals, as they may damage finishes. If uneven cleaning persists, consider increasing the cleaning time or repeating the cycle for better results. Always follow the owner’s manual guidelines for optimal performance.
Dealing with Unpleasant Odors After Cleaning
If your GE self-cleaning oven emits unpleasant odors after cleaning, ensure proper ventilation by opening windows or running an exhaust fan. Wipe down the interior with a mixture of baking soda and water to neutralize smells. Avoid using strong chemicals, as they can leave residues. For lingering odors, repeat the cleaning cycle with a shorter duration or use the steam cleaning option. Regular maintenance and prompt cleaning of food spills can help prevent strong odors from developing in the future.
Preventing Damage to the Oven During Cleaning
To prevent damage during the self-cleaning cycle, avoid using harsh chemicals or abrasive cleaners, as they can harm the oven’s finish. Never leave flammable materials inside the oven, and ensure it is completely empty before starting. For older ovens, high-heat cleaning may be too intense, potentially damaging internal components. Use the self-cleaning feature sparingly and only when necessary. Regular light cleaning can reduce the need for extreme heat cycles, protecting your oven’s longevity and performance over time.
Additional Tips for Effective Self-Cleaning
Minimizing Fumes and Odors During Cleaning
Ensure proper ventilation by opening windows and using exhaust fans. Avoid high-sulfur foods, as they release strong odors when burned. Regular cleaning reduces intense fumes.
Using Manual Cleaning for Tough Stains
For stubborn stains, manual cleaning can be an effective supplement to the self-cleaning feature. Apply a small amount of oven cleaner to tough spots, avoiding the heating elements. Let it sit for 30 minutes before wiping clean with a damp cloth. For lighter stains, a mixture of baking soda and water can be used. Always wear gloves and ensure the oven is cool before manual cleaning. This method is especially useful for ovens with heavy buildup that the self-cleaning cycle might not fully address. Follow all safety guidelines and product instructions carefully.
Safe Use of Oven Cleaners in Combination with Self-Cleaning
Oven cleaners can be used alongside the self-cleaning feature, but with caution. Apply cleaners only to tough stains, avoiding heating elements. Never use the self-clean cycle with heavy cleaner residue inside, as it may damage components. For lighter buildup, a mixture of baking soda and water is a safer alternative. Always wear gloves and ensure the oven is cool before manual cleaning. Avoid using harsh chemicals during the self-cleaning cycle to prevent fumes and potential damage. Follow product instructions carefully to maintain oven performance and safety.
Avoiding Harsh Chemicals During the Self-Cleaning Cycle
Avoid using harsh chemicals during the self-cleaning cycle to prevent damage and fumes. While oven cleaners like Easy Off can be used, they should not be applied during the high-heat cleaning process. Instead, clean manually before starting the cycle. Harsh chemicals can react with intense heat, releasing toxic fumes or damaging the oven’s interior. Always opt for gentle alternatives like baking soda and water for lighter buildup. This ensures a safer and more effective cleaning process, preserving your oven’s condition and longevity.
To reduce fumes and odors during the self-cleaning cycle, ensure proper ventilation by opening windows and turning on exhaust fans. This helps dissipate any strong smells. Clean lighter food residue manually before starting the cycle to minimize intense fumes. Avoid using harsh chemicals, as they can release toxic vapors when heated. Keep the area around the oven clear of flammable materials and follow the owner’s manual guidelines for optimal results. This approach ensures a safer and less intrusive cleaning experience for your GE self-cleaning oven.
Understanding Self-Cleaning Technology
Proper ventilation is key to reducing fumes and odors during the self-cleaning cycle. Open windows and use exhaust fans to circulate air. Lightly clean heavy debris beforehand to minimize intense smells. Avoid harsh chemicals, as they release toxic fumes when heated. Ensure the kitchen is well-ventilated to dissipate odors effectively. Regular maintenance and following the owner’s manual guidelines also help reduce fumes, ensuring a safer and fresher cleaning experience for your GE oven.
How High-Heat Self-Cleaning Works
High-heat self-cleaning ovens use extreme temperatures, typically around 900°F, to burn food residue into ash. This process, lasting 4-5 hours, requires the oven door to be locked. The self-cleaning latch ensures safety by sealing the oven during the cycle. After cooling, simply wipe away the ash. This method is effective for tough stains but may not be suitable for older ovens or those with preexisting damage. Always follow the owner’s manual for specific instructions to avoid potential issues. Proper ventilation is crucial to minimize fumes during the high-heat cycle.
Steam Cleaning as an Alternative Option
Steam cleaning offers a gentler alternative to high-heat self-cleaning. By using water, steam loosens food residue without extreme temperatures. This method is ideal for lighter messes and maintains the oven’s finish. GE ovens may require a water-filled pan placed inside during the steam cycle. It’s energy-efficient and reduces harsh fumes. For tougher stains, a combination of steam and manual cleaning is recommended. Always consult the owner’s manual for specific steam cleaning instructions to ensure optimal results and appliance longevity.
The Role of the Self-Cleaning Latch
The self-cleaning latch is a critical safety feature in GE ovens. It securely locks the oven door during the cleaning cycle, preventing accidental opening and potential burns. Once activated, the latch ensures a tight seal, allowing high temperatures to effectively clean the oven interior. This mechanism is essential for both safety and efficiency, as it traps heat and fumes inside. The latch automatically releases once the oven cools down, providing easy access for post-cleaning tasks. It is a key component in GE’s self-cleaning technology, designed to protect users while maintaining optimal performance.

GE-Specific Features and Connected Appliances
GE ovens integrate seamlessly with smart home systems, offering remote monitoring through the SmartHQ App. Users can control and troubleshoot their appliances effortlessly, enhancing convenience and efficiency.
Using the SmartHQ App for Remote Monitoring
The SmartHQ App enables remote monitoring and control of your GE self-cleaning oven. Download the app, connect your oven to your smart home system, and receive real-time updates. Set notifications for cleaning cycles, monitor progress, and adjust settings conveniently. Troubleshoot issues directly through the app and access user manuals for guidance. This feature enhances convenience, ensuring your oven operates efficiently while maintaining safety and performance. It’s a modern solution for seamless kitchen management and optimal appliance care.
Connecting Your GE Oven to Smart Home Systems
Connecting your GE oven to smart home systems enhances functionality and convenience. Download the SmartHQ App, follow on-screen instructions to link your oven, and enjoy seamless integration. This allows voice control through platforms like Alexa and Google Assistant. Receive notifications, monitor cleaning cycles, and adjust settings remotely. Ensure your oven is Wi-Fi enabled and properly configured for a smooth setup. This smart integration simplifies kitchen tasks, offering remote monitoring and control for a modern cooking experience.
Troubleshooting Through the GE Appliances App
Troubleshooting your GE oven is made easy with the GE Appliances App. The app offers real-time diagnostics, identifying issues and providing step-by-step solutions. Users can resolve common problems like error codes or connectivity issues directly through the app. Additionally, it allows scheduling service calls and accessing troubleshooting guides. The app also provides maintenance tips to prevent future issues, ensuring your oven operates smoothly. This feature-rich tool is a comprehensive solution for addressing and resolving concerns with your GE self-cleaning oven.
Best Practices for Maintaining Your GE Oven
Regularly clean spills and food residue to prevent buildup. Always follow the owner’s manual guidelines for optimal performance and safety. Check the oven’s condition before cleaning to ensure it’s suitable for the self-cleaning feature.
Regular Cleaning to Prevent Buildup
Regular cleaning is essential to prevent food residue from building up in your GE oven. After each use, wipe down the interior with a damp cloth to remove splatters and spills. For tougher stains, mix baking soda and water to create a paste, apply it to the affected areas, and let it sit overnight before wiping clean. Clean oven racks by soaking them in soapy water or running them through the dishwasher. Always inspect the oven floor for large debris and remove it before the self-cleaning cycle. This routine maintenance ensures optimal performance and prevents stubborn buildup.
Following the Owner’s Manual Guidelines
Always refer to your GE oven’s owner’s manual for specific instructions tailored to your model. The manual provides detailed guidance on using the self-cleaning feature, including safety precautions and activation steps. Familiarize yourself with recommended cleaning cycles, temperature settings, and preparation steps. It also outlines troubleshooting tips and maintenance routines. By following the manual’s guidelines, you ensure safe and effective cleaning while preserving your oven’s performance and longevity. Adhere to the instructions carefully to avoid potential damage or hazards.
Considering Your Oven’s Condition Before Cleaning
Before using the self-cleaning feature, assess your oven’s condition. Heavy buildup or worn-out components may require special attention. If your oven is older or has existing damage, high-heat cleaning could cause further issues. Always ensure racks and accessories are removed and that the oven is cool. For severe grime, manual cleaning may be necessary before the cycle. Regular light cleaning can prevent excessive residue buildup. Consult your owner’s manual or contact GE support if unsure about your oven’s suitability for self-cleaning.
Consulting GE Customer Support for Assistance
If you encounter issues or have questions about using your GE self-cleaning oven, consulting customer support is recommended. They can provide troubleshooting tips and clarify specific instructions. The GE Appliances app offers remote monitoring and assistance. Additionally, the owner’s manual is a valuable resource for addressing common problems. For complex issues, reaching out to GE’s customer service ensures personalized guidance, helping you maintain your oven efficiently and safely. Their support is designed to optimize your appliance’s performance and longevity.