Honeywell FocusPRO 6000 Series: Installation Overview
Honeywell FocusPRO 6000 installation involves wallplate mounting, wiring verification, system testing, and configuration of special functions for optimal performance and user control․
The Honeywell FocusPRO 6000 Series Programmable Thermostat represents a significant advancement in home climate control․ This digital, programmable thermostat offers users enhanced comfort and energy savings through precise temperature management․ Designed for ease of installation and operation, the 6000 Series caters to a wide range of heating and cooling systems, including conventional and heat pump setups․
This thermostat isn’t just about setting temperatures; it’s about creating a personalized comfort experience․ Features include programmable schedules, allowing users to tailor heating and cooling to their daily routines․ The FocusPRO 6000 also provides clear display information and intuitive controls, making adjustments simple․ Proper installation, guided by this manual, is crucial to unlocking the full potential of this device and ensuring years of reliable performance․
Package Contents Verification
Before beginning the installation process, carefully verify the contents of the Honeywell FocusPRO 6000 Series package․ You should find the thermostat unit itself, along with the accompanying wallplate․ Ensure a mounting screw kit is present, containing screws and anchors for secure wall attachment․
A wire label sheet is essential for organized wiring, and the installation guide – this document – provides step-by-step instructions․ Confirm the presence of any included batteries, if applicable․ If any components are missing or appear damaged, immediately contact Honeywell customer support at 1-800-468-1502 to request replacements․ Do not proceed with installation until all necessary parts are accounted for, ensuring a smooth and successful setup․
Safety Precautions
Important: Disconnect power to your heating and cooling system at the breaker box before commencing any wiring or installation procedures․ Failure to do so presents a serious risk of electrical shock․ If you are uncomfortable working with electrical wiring, consult a qualified HVAC technician․
Always verify wiring connections carefully, ensuring correct terminal assignments to prevent system damage․ Do not install the thermostat in a location exposed to direct sunlight, extreme temperatures, or moisture․ Keep the thermostat away from flammable materials․ Observe all local electrical codes and regulations during installation․ Proper grounding is crucial for safety; ensure a secure ground connection is established․
Wallplate Installation
Begin by removing the existing thermostat and mounting the new wallplate, ensuring it’s level and securely fastened to the wall for stability․
Removing Existing Thermostat
Before initiating the Honeywell FocusPRO 6000 installation, carefully disconnect power to your heating and cooling system at the breaker panel to prevent electrical shock․ Gently remove the cover of your existing thermostat to expose the wiring terminals․ It’s crucial to photograph the existing wiring configuration – this serves as a vital reference during the new thermostat’s wiring process․
Label each wire with the corresponding terminal designation from the old thermostat; this minimizes confusion․ Carefully disconnect the wires, ensuring they don’t fall back into the wall․ Once all wires are disconnected, remove the old wallplate․ Take note of any mounting screws or anchors used, as you may need them for the new installation․ Proper documentation and cautious disconnection are key to a smooth transition․
Mounting the Wallplate
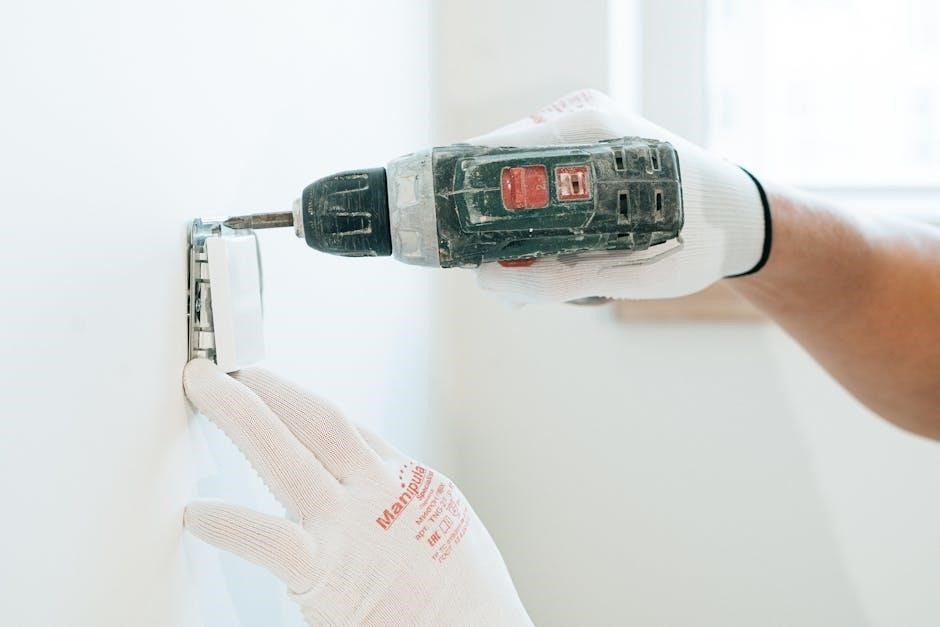
With the old thermostat removed, position the Honeywell FocusPRO 6000 wallplate against the wall, ensuring it covers the existing mounting holes, if possible․ Utilize a level to guarantee the wallplate is perfectly horizontal – this is critical for accurate thermostat operation and aesthetic appeal․
Mark the screw hole locations with a pencil․ If necessary, drill pilot holes for the provided screws or anchors, depending on your wall material․ Securely attach the wallplate to the wall using the appropriate screws․ Ensure the wallplate is firmly mounted and doesn’t wobble․ A stable wallplate is foundational for proper thermostat functionality and long-term reliability․
Wallplate Leveling and Securing
After mounting, re-verify the wallplate’s level using a spirit level, both horizontally and vertically․ Even a slight tilt can affect the thermostat’s internal sensors and impact temperature readings․ Tighten the mounting screws incrementally, alternating between them to apply even pressure and prevent warping․
Ensure the screws are flush with the wallplate surface, avoiding any protrusions that might interfere with thermostat mounting․ Gently test the wallplate’s stability by applying slight pressure․ A securely mounted wallplate is paramount for reliable operation and prevents future issues․ Double-check for a firm, wobble-free installation before proceeding․
Wiring Terminal Designations
Proper wiring is crucial; identify terminals for Common (C), heating, cooling, heat pump, emergency heat, and zoning panels based on system type․
Understanding Common (C) Terminal
The Common (C) terminal provides the necessary 24V AC power return path for the Honeywell FocusPRO 6000 thermostat to operate correctly․ It’s essential for consistent performance, especially with modern systems requiring continuous power․ If your existing thermostat lacks a C-wire, you may need to install one, potentially utilizing a C-wire adapter․
A stable C-wire connection prevents issues like flickering displays or erratic thermostat behavior․ For systems utilizing a two-transformer setup, remember to remove the jumper on the wallplate․ The C terminal must originate from the cooling transformer for optimal functionality․ Without a reliable C connection, the thermostat may draw power from other system wires, causing malfunctions․ Always verify proper voltage at the C terminal during installation․
Wiring for Heating Systems
When wiring for heat-only systems with the Honeywell FocusPRO 6000, connect the heating wire (typically labeled ‘W’ or ‘Heat’) to the corresponding terminal on the thermostat wallplate․ Ensure the wire is securely fastened․ If utilizing a zoning panel, connect the ‘W’ wire to the panel’s heat output terminal․
For systems with Emergency Heat (Em Heat), connect the appropriate wire to the designated ‘Em’ terminal․ This allows the thermostat to switch to auxiliary heat during extreme temperature drops․ Remember that the Common (C) wire is crucial for reliable operation․ Verify proper wiring according to your specific heating system’s configuration and consult a qualified technician if needed․
Wiring for Cooling Systems
For cooling system wiring with the Honeywell FocusPRO 6000, connect the cooling wire – typically labeled ‘Y’ or ‘Cool’ – to the corresponding terminal on the wallplate․ A secure connection is vital for proper operation․ If a zoning panel is present, connect the ‘Y’ wire to the panel’s cooling output terminal․
Ensure the Common (C) wire is correctly connected, as it provides power to the thermostat․ In some 2-transformer systems, a jumper may need removal․ Always verify the wiring diagram specific to your cooling system․ Proper wiring ensures efficient and reliable cooling control․ If unsure, consult a qualified HVAC technician for assistance․
Wiring for Heat Pump Systems
Wiring heat pump systems with the Honeywell FocusPRO 6000 requires careful attention to terminal designations․ Connect the reversing valve wire (O/B) to the appropriate terminal – ‘O’ for cooling and ‘B’ for heating, depending on your system’s configuration․ The compressor wire (Y) connects to the ‘Y’ terminal, and the auxiliary heat wire (AUX) to its designated terminal․
A common wire (C) is essential for powering the thermostat; For systems with auxiliary heat, ensure proper wiring to enable efficient heating during colder temperatures․ Refer to the specific wiring diagram for your heat pump model․ Incorrect wiring can lead to malfunction; professional assistance is recommended if needed․
Wiring for Emergency Heat
The Honeywell FocusPRO 6000’s emergency heat wiring is crucial for backup heating during primary system failure․ Connect the emergency heat wire to the designated terminal, typically labeled ‘E’․ This wire activates auxiliary heat when the primary heat source is unavailable, ensuring continued warmth․
For systems utilizing Honeywell zoning panels, connecting to the ‘E’ terminal switches the panel to emergency heat mode․ Remove any jumpers present for 2-transformer systems before connecting․ Proper wiring ensures seamless transition to backup heating․ Always verify the wiring diagram specific to your setup and consult a professional if unsure, preventing potential system issues․
Wiring for Zoning Panels
When integrating the Honeywell FocusPRO 6000 with zoning panels, careful wiring is essential for controlled heating and cooling across different zones․ Connect the appropriate wires from the thermostat to the corresponding terminals on the zoning panel․ The ‘C’ (Common) connection must originate from the cooling transformer for proper operation․
Utilize the ‘E’ terminal connection to switch the zoning panel into emergency heat mode when needed․ Ensure all wiring adheres to the zoning panel’s specific instructions and the thermostat’s wiring diagram․ Incorrect wiring can lead to inconsistent temperatures or system malfunctions․ Always double-check connections before powering on the system․

Conventional System Wiring
Conventional systems—heat-only, cool-only, or heat and cool—require specific wiring configurations to the Honeywell 6000 thermostat for proper operational control․
Wiring Heat-Only Systems
For heat-only systems utilizing the Honeywell FocusPRO 6000, connect the Rh terminal to the heating system’s 24V hot wire․ The W terminal receives the wire initiating heat activation․ A common (C) wire connection is optional, but recommended for consistent power, especially with newer systems or when utilizing advanced features․
Ensure the system’s power is completely off during wiring․ If a 2-transformer system is present, remove the jumper․ Verify proper wire connections and secure them firmly to the terminals․ Incorrect wiring can lead to system malfunction or damage․ Always consult the system’s specific wiring diagram alongside this guide for accurate installation․
Wiring Cooling-Only Systems
When wiring a cooling-only system with the Honeywell FocusPRO 6000, connect the Rh terminal to the cooling system’s 24V hot wire․ The Y terminal receives the wire activating the compressor․ A common (C) wire is highly recommended for reliable operation and to support advanced thermostat functionalities․
Prioritize safety by disconnecting power before commencing wiring․ Ensure wires are securely fastened to their respective terminals․ If utilizing a 2-transformer system, remember to remove the jumper․ Double-check all connections against the cooling system’s wiring diagram to prevent errors and potential damage; Proper wiring ensures efficient and dependable cooling control․
Wiring Heat and Cool Systems
For heat and cool systems, connect Rh and Rc terminals to the appropriate 24V hot wires from the heating and cooling units․ The Y terminal activates the compressor for cooling, while the W terminal energizes the heating system․ A common (C) wire is crucial for powering the thermostat and enabling all features․
Verify the system’s wiring diagram before connecting any wires․ If a 2-transformer system is present, remove the jumper․ Securely fasten all wires to their designated terminals․ Proper wiring ensures seamless transitions between heating and cooling modes, maximizing comfort and energy efficiency․ Always disconnect power before starting the wiring process for safety․
Heat Pump System Wiring
Heat pump wiring requires connecting specific terminals for reversing valve control (O/B), auxiliary heat (AUX), and compressor (Y) alongside common wiring practices․
Wiring Standard Heat Pumps
When wiring a standard heat pump with the Honeywell FocusPRO 6000, carefully connect the appropriate terminals․ The ‘Y’ terminal receives power for cooling, while the ‘O’ or ‘B’ terminal controls the reversing valve, switching between heating and cooling modes – verify which is applicable for your system․
The ‘G’ terminal activates the fan․ A common (C) wire is essential for consistent power․ For systems utilizing emergency heat, ensure proper connection to the designated terminal․ Refer to the wiring diagram specific to your model (TH6320U/TH6220D) as shaded areas may apply․ Removing jumpers for 2-transformer systems is crucial․ Always disconnect power before beginning any wiring work and double-check all connections for security․
Wiring Heat Pumps with Auxiliary Heat
For heat pump systems incorporating auxiliary heat, the Honeywell FocusPRO 6000 requires specific wiring configurations․ Connect the ‘AUX’ or ‘E’ terminal to the auxiliary heat relay, providing supplemental warmth during colder temperatures; The ‘Y’ terminal still controls cooling, and ‘O/B’ manages the reversing valve․
Ensure the common (C) wire is securely connected for reliable operation․ When using Honeywell zoning panels, the ‘E’ terminal can switch the panel to emergency heat․ Remember to remove any jumpers for 2-transformer systems․ Consult the wiring diagram for your specific model (TH6320U/TH6220D), noting any shaded areas․ Prioritize safety by disconnecting power before wiring․
Thermostat Mounting & Power Up
Carefully connect the thermostat to the installed wallplate, ensuring a secure fit․ Then, power up the system and verify the display functions correctly․
Connecting the Thermostat to the Wallplate
After verifying the wiring is correct and secure, gently align the Honeywell FocusPRO 6000 thermostat with the mounted wallplate․ Ensure the thermostat body slides smoothly onto the wallplate, avoiding any forced connections that could damage the terminals or internal components․
Listen for a distinct click, indicating the thermostat is properly seated and engaged with the wallplate’s locking mechanism․ A firm, flush fit is crucial for reliable operation and prevents accidental disconnections․ Once connected, lightly tug on the thermostat to confirm it’s securely attached․
Double-check that all wiring connections remain undisturbed during this process․ A loose connection can lead to system malfunctions or inaccurate temperature readings․ Proceed to the next step only after confirming a secure and stable connection between the thermostat and the wallplate․
Initial Power-Up and Display Check
Upon securely connecting the thermostat to the wallplate, the display should illuminate, indicating power is being supplied to the unit․ If the display remains blank, immediately re-verify the wiring connections, particularly the common (C) wire, and ensure the power supply to the HVAC system is active․
Observe the initial display screen for any error messages or unusual indicators․ A normal startup sequence will typically show the Honeywell logo followed by a system check or the current room temperature․
Familiarize yourself with the basic display elements and navigation buttons․ Confirm that the backlight functions correctly and that all displayed information is clear and legible․ Any persistent display issues should be addressed before proceeding with system testing․
Installer System Test
The installer system test verifies proper heating and cooling functionality by accessing a special test mode through button presses on the thermostat․
Initiating the System Test Mode
To begin the system test, simultaneously press and hold the ‘Up’ and ‘Down’ buttons on the Honeywell FocusPRO 6000 thermostat until the display changes, indicating entry into test mode․ This initiates a diagnostic sequence designed to evaluate the core functions of your heating and cooling system․ The display will then prompt you to proceed with individual tests for heating and cooling․
Carefully follow the on-screen instructions, utilizing the ‘Next’ button to navigate between tests․ Remember that this mode is specifically for installer verification, ensuring correct wiring and operational integrity before handing the system over to the end-user․ Accurate testing is crucial for a properly functioning thermostat․
Testing Heating Functionality
During the heating test, press the ‘Up’ button to activate the heating system․ Observe if the connected heating equipment (furnace, boiler, etc․) responds by initiating a heating cycle․ Verify that the blower fan also engages, distributing warm air throughout the designated zones․ Monitor the thermostat display to confirm that it accurately reflects the system’s operational status – indicating a call for heat and subsequent heat delivery․
If the heating system fails to activate, re-examine the wiring connections, particularly those related to the heating terminals․ Ensure proper voltage is reaching the unit․ A successful test confirms correct wiring and operational capability of the heating system․
Testing Cooling Functionality
To test cooling, press the ‘Down’ button on the thermostat to initiate a cooling call․ Listen for the outdoor condenser unit to start and verify that the indoor blower fan activates, circulating cool air․ Observe the thermostat display, confirming it indicates a request for cooling and subsequent cooling operation․ Ensure the temperature reading on the thermostat begins to decrease as the system runs․
If the cooling system doesn’t respond, double-check the wiring connections to the cooling terminals․ Confirm adequate voltage supply to the unit․ A successful cooling test validates correct wiring and proper operation of the cooling system components․
Completing the System Test
After successfully testing both heating and cooling functionalities, press the ‘DONE’ button on the Honeywell FocusPRO 6000 thermostat to finalize the system test mode․ This action saves the current configuration and returns the thermostat to normal operating mode․ Verify the display returns to the standard temperature screen․
Document the test results, noting any issues encountered and their resolutions․ Provide the homeowner with a brief overview of the thermostat’s operation and programming features․ For further assistance or troubleshooting, refer to the Honeywell customer support line at 1-800-468-1502․

Special Functions & Settings
Configure system type, set accurate date and time, and program personalized temperature schedules to maximize energy savings and comfort with your Honeywell thermostat․
Configuring System Type
Properly configuring the system type is crucial for accurate thermostat operation․ The Honeywell FocusPRO 6000 allows selection between various heating and cooling configurations․ Access the settings menu via the thermostat interface, navigating to the “System Type” option․
Available options typically include heat-only, cool-only, heat and cool, heat pump, and heat pump with auxiliary heat․ Carefully select the option that precisely matches your home’s HVAC system․ Incorrect selection can lead to improper operation, such as the cooling system activating when heat is needed, or vice versa․ Refer to your HVAC system’s documentation if unsure․ Save the changes to finalize the system type configuration․
Setting Date and Time
Accurate date and time settings are essential for proper scheduling and operation of your Honeywell FocusPRO 6000 thermostat․ Access the settings menu through the thermostat’s interface, then locate the “Date and Time” option․ You’ll typically be able to adjust the month, day, and year individually․
Similarly, adjust the hour and minute to reflect the current time․ Ensure you also select the correct AM or PM designation․ Some models may offer automatic daylight saving time adjustment; verify this setting is enabled if applicable․ Saving these changes ensures the thermostat accurately tracks time, enabling programmed schedules to function as intended, maximizing energy efficiency and comfort․
Programming Temperature Schedules
The Honeywell FocusPRO 6000 allows customized temperature schedules for enhanced comfort and energy savings․ Access the scheduling menu and define different periods – such as Wake, Leave, Return, and Sleep – for each day of the week․ For each period, set your desired temperature․
You can create unique schedules for weekdays and weekends, or copy settings across multiple days․ Consider your daily routines when programming; lower temperatures while away or asleep, and raise them before you wake or return home․ Utilizing these features optimizes energy use and ensures a comfortable environment tailored to your lifestyle․
Specifications
The FocusPRO 6000 boasts specific electrical ratings, an operating temperature range, and defined dimensions and weight for proper installation and functionality․
Electrical Ratings
Understanding the electrical specifications is crucial for a safe and functional Honeywell FocusPRO 6000 installation․ This thermostat is designed to operate with standard 24VAC systems, commonly found in residential heating and cooling setups․ The voltage range typically falls between 20-30 VAC, ensuring compatibility with most HVAC equipment․
Current draw is an important consideration, particularly when evaluating battery backup options or system power limitations․ While specific amperage varies by model (TH6000, TH6220D, TH6320U), it generally remains within acceptable limits for standard transformer capacities․ Always verify that your existing HVAC system’s transformer meets or exceeds the thermostat’s power requirements to prevent operational issues or damage․ Refer to the unit’s documentation for precise electrical details․
Operating Temperature Range
The Honeywell FocusPRO 6000 thermostat is engineered to function reliably within a broad spectrum of ambient temperatures, ensuring consistent performance across diverse climates․ The typical operating temperature range spans from 32°F to 104°F (0°C to 40°C)․ However, it’s crucial to avoid exposing the thermostat to temperatures outside this range for prolonged periods․
Extreme temperatures, whether excessively hot or cold, can potentially affect the accuracy of temperature readings and the longevity of internal components․ Storage temperature limits are generally wider, but continuous operation outside the specified range is not recommended․ Proper installation location, shielded from direct sunlight or drafts, contributes to maintaining optimal operating conditions and maximizing the thermostat’s lifespan․
Dimensions and Weight
Understanding the physical specifications of the Honeywell FocusPRO 6000 is vital for proper installation and ensuring compatibility with existing wall configurations․ The thermostat’s dimensions are approximately 4․7 inches (width) x 3․1 inches (height) x 1․2 inches (depth)․ These compact dimensions allow for discreet integration into most home environments․
Regarding weight, the Honeywell FocusPRO 6000 thermostat is remarkably lightweight, tipping the scales at around 0․5 pounds (approximately 227 grams)․ This minimal weight simplifies the mounting process and reduces stress on the wall surface․ Accurate measurements are essential when planning for wallplate placement and ensuring a flush, secure fit․