
Delta 4-in-1 Crib Instructions: A Comprehensive Guide
This guide offers detailed, step-by-step instructions for assembling and converting your Delta Children 4-in-1 crib, ensuring a safe and comfortable sleep environment.
It covers assembly, toddler, daybed, and full-size bed configurations, alongside crucial safety precautions and troubleshooting tips for a seamless experience.
Welcome to the world of versatile sleep solutions! The Delta 4-in-1 Crib is designed to grow with your child, offering exceptional value and adaptability. This convertible crib seamlessly transitions from a safe and cozy nursery staple to a stylish toddler bed, a playful daybed, and ultimately, a sophisticated full-size bed.
This comprehensive guide will walk you through each stage of assembly and conversion, ensuring a secure and long-lasting piece of furniture for your little one. We understand that assembling furniture can sometimes be daunting, which is why we’ve prioritized clarity and detail in these instructions.
Prepare to create a nurturing and evolving sleep space that will accompany your child through many precious years, all starting with this adaptable 4-in-1 crib!
Safety Warnings and Precautions
Prioritizing your child’s safety is paramount. Always follow these crucial warnings during assembly and use of the Delta 4-in-1 Crib. Ensure all bolts and pins are securely tightened, and regularly inspect them for looseness. Never substitute parts, and always use only Delta-approved components for conversions.
Place the crib on a level surface, away from windows, cords, and potential hazards. Do not place the crib near heat sources. Adhere to the recommended mattress size and ensure it fits snugly within the crib frame. Supervise your child closely at all times, and familiarize yourself with all safety features.
Stop using the crib if any parts are damaged or missing. Failure to follow these precautions could result in serious injury.
Parts List and Identification
Before beginning assembly, carefully unpack all components and verify against this list. The Delta 4-in-1 Crib includes headboard, footboard, two crib sides, and a mattress support system. Hardware includes: M6 x 50mm bolts (x3), M6 x 35mm bolts (x1), and Φ4x30mm metal pins (x4).
Refer to the diagrams for clear identification of each part. Missing components? Contact Delta Children’s customer support immediately. Proper identification is crucial for correct assembly. Ensure you have all necessary tools readily available before starting. This comprehensive list will streamline the building process and prevent frustration.
Double-check quantities to avoid delays during construction.
Identifying Crib Components
The headboard and footboard are distinguished by their design; the headboard typically features a taller profile. Crib sides are identical and attach to both the headboard and footboard. The mattress support is a metal frame designed to hold the mattress at the appropriate height.
Carefully examine each piece for pre-drilled holes – these indicate attachment points. Familiarize yourself with the shape and size of each component before assembly. Refer to the included diagrams for visual clarification. Correctly identifying each part prevents errors and ensures a structurally sound crib.
Pay attention to any labeling on the components.
Hardware Checklist (Bolts, Pins, etc.)
Verify you have all necessary hardware before starting assembly. This includes M6 x 50mm bolts (quantity 3), and M6 x 35mm bolts (quantity 1). Φ4x30mm metal pins are also essential (quantity 4); Ensure all items are present to avoid delays.
Inspect each bolt and pin for damage – discard any that are stripped or bent. Keep the hardware organized to streamline the assembly process. A small container or labeled bags are helpful. The checklist ensures you have the correct fasteners for each step, contributing to a secure and stable crib construction.
Double-check quantities against the parts list.
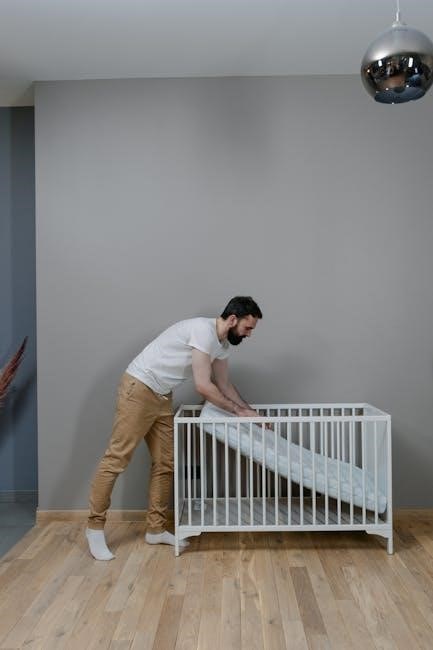
Step-by-Step Assembly Instructions
Begin by carefully unpacking all components and verifying against the parts list. Place the crib sides on a soft, protected surface – assembly on a rug or blanket is recommended to prevent scratching. Follow the manual’s sequential steps precisely.
Attach the headboard and footboard to the assembled sides, ensuring proper alignment before fully tightening bolts. Install the mattress support, adjusting to the desired height setting. Regularly check bolt tightness throughout the process.
Refer to the diagrams for visual guidance, and don’t force any connections.
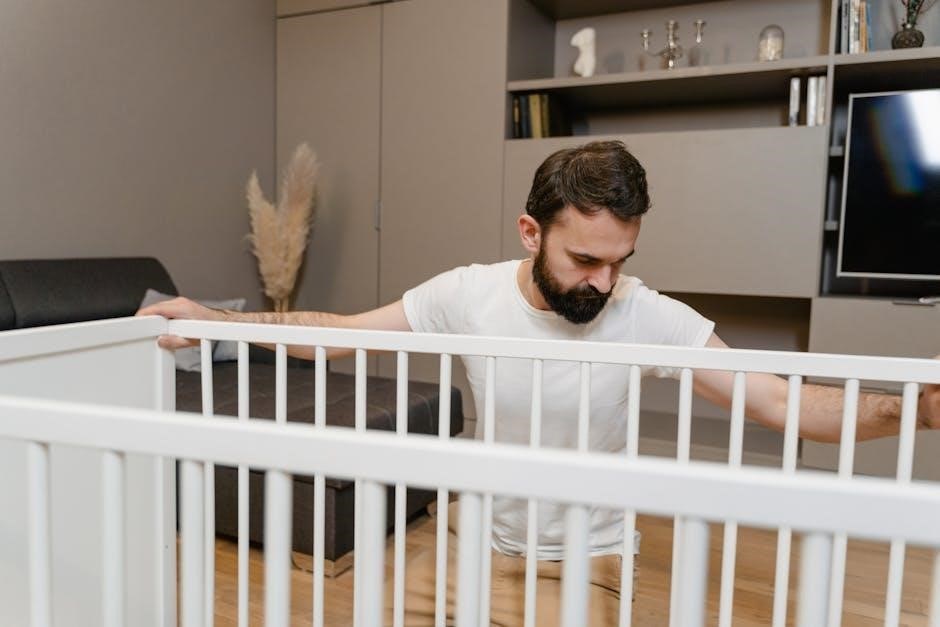
Assembling the Crib Sides
Lay one crib side panel flat on a protected surface, like a rug or blanket, to prevent scratches. Attach the connecting hardware – typically bolts and pins – to the designated points on the side panel. Carefully align the second side panel and secure it to the first, ensuring a flush connection.
Use the provided tools to tighten the bolts, but avoid over-tightening, which could damage the wood. Repeat this process for the remaining side panels, forming the rectangular frame of the crib. Double-check all connections for stability before proceeding.
Attaching the Headboard and Footboard
With the crib sides assembled, carefully position the headboard at one end of the frame. Align the pre-drilled holes on the headboard with those on the side panels. Secure the headboard using the appropriate bolts, tightening them firmly but cautiously to avoid damage.
Repeat this process for the footboard at the opposite end of the crib frame. Ensure both the headboard and footboard are securely attached and do not wobble. Double-check all bolt connections for tightness and stability before moving on to the next assembly step.
Installing the Mattress Support
Locate the mattress support frame and the corresponding hardware – typically metal pins or bolts. Insert the support into the designated slots within the crib sides, headboard, and footboard. Ensure the support rests securely and evenly on all sides.
Secure the mattress support using the provided pins or bolts, tightening them firmly. Verify the support is level to provide a safe and stable surface for the mattress. Double-check all connections before placing the mattress inside the crib, ensuring a snug and secure fit.
Converting to a Toddler Bed
Transitioning your crib to a toddler bed requires a separate Toddler Bed Kit, sold independently. Remove one crib side rail, creating an open side for easy access. Attach the included toddler guardrail to this opening, securing it firmly with the provided hardware.
Lower the mattress support to the lowest position, ensuring your child cannot climb over the guardrail. Confirm all connections are tight and secure before allowing your toddler to use the bed. This conversion provides a safe and comfortable space as your child grows and develops.
Toddler Bed Kit Requirements
A dedicated Toddler Bed Kit is essential for safely converting your Delta 4-in-1 crib. This kit typically includes a toddler guardrail designed to prevent falls from the open side of the bed. It also contains the necessary hardware – often bolts and screws – specifically sized for secure attachment to the crib frame.
Ensure the kit is compatible with your specific crib model; check the Delta Children website for confirmation. The kit does not include a new mattress; you’ll continue using the crib mattress lowered to its lowest setting. Purchasing the correct kit is crucial for a stable and secure toddler bed.
Instructions for Toddler Bed Conversion
Begin by removing the crib’s upper rail and mattress support, retaining all hardware for potential future use. Attach the toddler guardrail to the designated side of the crib frame using the provided bolts and screws from the Toddler Bed Kit. Ensure the guardrail is securely fastened, checking for any wobble or instability.
Lower the mattress to its lowest position within the crib frame. This is a critical safety step to prevent your child from climbing over the guardrail. Double-check all connections before allowing your child to use the converted toddler bed. Regularly inspect the guardrail’s stability.
Converting to a Daybed
The daybed configuration utilizes the existing crib frame, offering a versatile seating and lounging space. Remove both crib side rails, leaving only the headboard and footboard intact. Ensure all bolts and pins are completely removed, storing them safely for potential re-conversion. Position the mattress directly on the floor within the headboard and footboard structure.
This creates a comfortable daybed suitable for reading or relaxing. Regularly check the stability of the headboard and footboard, tightening any loose connections. Consider adding pillows and cushions for enhanced comfort and style.
Daybed Configuration Details
The Delta 4-in-1 crib’s daybed mode offers a low-to-the-ground sleeping or lounging option, ideal for older toddlers and young children. It requires the removal of both crib side rails, transforming the crib into an open-sided bed frame. The existing headboard and footboard provide a secure perimeter, preventing accidental roll-offs.

Mattress placement is directly on the floor, eliminating the need for a box spring. This configuration is best suited for children who have outgrown the crib but are not yet ready for a standard bed. Always supervise young children using the daybed.
Steps for Daybed Conversion

Begin by carefully removing both crib side rails, utilizing the original hardware and reversing the assembly process. Ensure all bolts and pins are completely detached and stored safely. Lower the mattress support to the lowest setting, or remove it entirely, as the mattress will rest directly on the floor.
Position the mattress within the headboard and footboard frame, ensuring it fits snugly. Double-check the stability of the assembled daybed before allowing a child to use it. Regularly inspect the frame for any loose hardware or potential hazards.
Converting to a Full-Size Bed
Transitioning to a full-size bed requires a separate full-size bed frame, which is not included with the crib. Carefully detach the headboard and footboard from the crib structure, retaining all original hardware. Attach the headboard and footboard to the full-size bed frame, utilizing appropriate bolts and brackets (not provided).
Ensure a secure connection between the crib pieces and the frame, following the frame manufacturer’s instructions. A box spring and full-size mattress are necessary to complete the conversion. Always prioritize stability and safety during and after the conversion process.
Full-Size Bed Frame Requirements
A standard full-size bed frame is essential for the conversion, as the crib components alone do not form a complete bed. The frame must be capable of supporting a full-size mattress and box spring, ensuring adequate weight distribution and stability. Look for a frame with appropriate mounting points or brackets to securely attach the crib’s headboard and footboard.
Compatibility with standard bed frame dimensions is crucial. Consider the frame’s material and construction for durability and longevity. Hardware for attaching the crib pieces to the frame is typically not included and must be purchased separately.
Conversion Steps to Full-Size Bed
Begin by detaching the crib’s side rails, leaving only the headboard and footboard intact. Position the headboard and footboard onto your pre-assembled full-size bed frame, aligning the mounting points. Securely attach the crib pieces to the frame using appropriate bolts and hardware – these are usually purchased separately.
Ensure all connections are tightened for maximum stability. Place the full-size mattress and box spring onto the frame, confirming a snug and secure fit. Double-check all attachments before use, and periodically inspect for any loosening over time.
Troubleshooting Common Assembly Issues
Missing parts can often be resolved by contacting Delta Children’s customer support, providing your crib model and the missing component details. For wobbling or instability, re-tighten all bolts and pins, ensuring they are fully secured. Check that the mattress support is correctly installed and level.
If issues persist, disassemble and reassemble the affected section, carefully following the instructions; Inspect all components for damage; replacements may be necessary. Reddit communities offer valuable insights from other users facing similar challenges – search for your crib model!
Addressing Missing Parts
Discovering missing parts during assembly is frustrating, but easily addressed. First, double-check the packaging and surrounding area – small items can easily be overlooked. If a part is genuinely missing, contact Delta Children’s customer support immediately, providing your crib model number (25081 for example) and a description of the missing component.
Have your purchase date ready to expedite the process. Delta typically ships replacement parts free of charge. Reference the parts list (including bolts like M6 x 50mm and pins Φ4x30mm) to accurately identify the needed item. Avoid using substitute parts, as they may compromise safety.
Fixing Wobbling or Instability
A wobbly crib poses a safety risk and requires immediate attention. Begin by systematically tightening all bolts and pins – M6 x 50mm and Φ4x30mm are common sizes. Ensure all connections are secure, but avoid over-tightening, which can damage the wood. Check the mattress support is correctly installed and level.
If wobbling persists, inspect the floor surface; uneven flooring can contribute to instability. Consider using furniture pads under the crib legs to level it. Re-examine the assembly steps to confirm all parts are correctly positioned. If issues remain, contact Delta’s support for assistance.
Maintenance and Care
Regular maintenance ensures the longevity and safety of your Delta 4-in-1 crib. Cleaning should involve a damp cloth and mild soap; avoid harsh chemicals that could damage the finish. Periodically inspect all bolts, pins, and connections for tightness – M6 x 50mm and Φ4x30mm are key.
Check for any signs of wear or damage to the wood. Ensure the mattress support remains secure and free of defects. Follow Delta’s guidelines for converting the crib, and always double-check stability after each adjustment. Consistent care safeguards your child’s sleep environment.
Cleaning Instructions
To maintain a hygienic sleep space, regularly clean your Delta 4-in-1 crib. Use a soft, damp cloth with mild soap to wipe down all surfaces. Avoid abrasive cleaners, solvents, or bleach, as these can harm the crib’s finish. Pay close attention to areas prone to spills or messes, like the sides and footboard.

Ensure the crib is completely dry before placing the mattress back inside. For stubborn stains, a gentle wood cleaner may be used, following the manufacturer’s instructions. Regular dusting will prevent buildup, keeping the crib looking its best and ensuring a safe environment.
Regular Inspection Guidelines

Consistent inspection is vital for maintaining crib safety. Periodically check all bolts, pins, and screws to ensure they remain tightened; retighten as needed. Inspect the crib sides and headboard/footboard for any cracks or damage, addressing issues promptly. Examine the mattress support to confirm it’s secure and level.
Check for any loose or missing parts, and replace them immediately. Ensure all conversion mechanisms (toddler bed, daybed, full-size) function correctly. Regularly assess the overall stability of the crib, addressing any wobbling or instability. A proactive approach ensures continued safety.
Understanding the Crib’s Convertible Features

The Delta 4-in-1 crib is designed for longevity, adapting to your child’s growth. It begins as a traditional crib, then converts to a toddler bed, utilizing a separate toddler bed kit. Further transformation yields a daybed configuration, offering a relaxed lounging space.
Finally, it converts to a full-size bed, requiring a separate full-size bed frame. Each conversion alters the crib’s structure and functionality, demanding adherence to specific instructions. Understanding these stages ensures safe and proper transitions, maximizing the crib’s value and adaptability throughout childhood.
Additional Resources and Support
For comprehensive assistance, visit the official Delta Children website, where you’ll find frequently asked questions (FAQs) addressing common concerns. The website provides downloadable manuals and helpful guides, supplementing these instructions. If you require direct support, Delta Children offers dedicated customer service, reachable through their online contact form or by phone.

Furthermore, the Reddit community (r/instructionmanuals) hosts discussions where users share experiences and solutions related to Delta crib assembly. This platform can offer peer-to-peer support and insights, complementing official resources for a smoother setup process.
Delta Children Website and FAQs
The Delta Children website serves as a central hub for all product-related information, including detailed assembly guides and safety guidelines for your 4-in-1 crib. A dedicated FAQ section addresses frequently asked questions, covering topics from parts identification to conversion procedures.
You can easily download digital copies of the quick start manual and complete instruction booklets directly from the site. The website also features helpful videos demonstrating assembly steps, offering a visual aid to complement these written instructions. Explore the support section for troubleshooting tips and contact information.

Customer Support Contact Information
For personalized assistance with your Delta 4-in-1 crib assembly or any related concerns, Delta Children offers multiple avenues for support. You can reach their customer service team via phone during business hours, allowing for immediate clarification of instructions or troubleshooting.
Alternatively, utilize their online contact form for non-urgent inquiries, providing detailed information about your issue. Email support is also available, ensuring a documented record of your communication. The Delta Children website provides a comprehensive list of contact details, including addresses and social media links for further engagement.
Reddit Community Discussions & Common Problems
Online forums, particularly Reddit’s r/instructionmanuals, reveal common assembly challenges with the Delta 4-in-1 crib. Users frequently report difficulties deciphering the included manual, specifically regarding panel alignment and hardware identification.
Wobbling cribs and missing parts are recurring issues, prompting discussions on effective solutions and contacting customer support. Many commend the clarity of online video tutorials as a supplement to the printed instructions. The community emphasizes the importance of carefully checking all components before beginning assembly and sharing experiences to help others navigate potential roadblocks.
Specific Bolt & Pin Details (M6 x 50mm, Φ4x30mm)
The Delta 4-in-1 crib assembly utilizes specific hardware, notably M6 x 50mm bolts (quantity: 3) for primary structural connections. These are crucial for securing the headboard, footboard, and side rails. Additionally, M6 x 35mm bolts (quantity: 1) are used in certain configurations.
Φ4x30mm metal pins (quantity: 4) serve as locking mechanisms, preventing component separation. Proper tightening of bolts and secure pin placement are vital for crib stability. Ensure correct hardware is used in each step, referencing the parts list to avoid assembly errors and maintain structural integrity.
Crib Dimensions and Specifications
The Delta 4-in-1 Convertible Crib boasts versatile dimensions designed to accommodate a growing child. Typical exterior dimensions are approximately 54.5 inches in length, 29.75 inches in width, and 36 inches in height. These measurements may slightly vary based on the specific model (Chesapeake Panel, for example).
The crib is engineered to support a standard size crib mattress, generally 52 x 28 inches. Weight capacity is typically capped at 50 pounds. Always refer to the specific model’s documentation for precise specifications, ensuring compatibility with bedding and adherence to safety guidelines.